


How to: carry a float in colourwork
video by
Let's Knit Together
- Overview
- Practical Guides
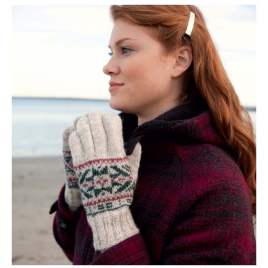
When you’re working with two or more colours on a row, especially with the Fair Isle technique, you’ll end up with used strands, called floats, on the wrong side. If a colour is not used for more than a few stitches – generally around five – it makes sense to bind the float to the back of the work to reduce snagging.
A long float at the back could cause a tangle on another row, or if it was inside a glove or sock it might snag a digit when pulled on and also pull the knitting. The solution is to enclose the unused yarn strand a few stitches along behind a stitch in the current colour being used. Carrying the float is also important for maintaining an even tension. The video shows a floats being carried when knitting with a strand in each hand, which is generally recognised as the fastest way to work this type of stranded colourwork, but the principle is the same however you hold your yarn. It is key to maintain the relative positions of your strands when being carried across the back of the work on both the right side and the wrong side as this produces a more even effect overall. Here we will assume that the upper strand (usually the background) colour is held in the right hand and the lower strand (usually the contrast colour) is held in the left hand.
Tip If your pattern uses more than two colours, keep each one in the same relative position throughout. Make a note at the beginning to keep track.
The basic principle for carrying a float is to insert the right-hand needle into the next knit (or purl) stitch to be worked. Wrap the carried yarn around the right-hand needle first, followed by the working yarn. Next unwrap the carried yarn to leave only the working yarn on the the right-hand needle. Finish working the knit (or purl) stitch. The float will be caught on the wrong side. Work the next stitch and you’ll see the carried yarn held in. Stretch stitches on the right-hand needle to ensure the tension is not too tight, as usual with this colourwork technique. If you are working in the round you may only be working one side either knit or purl, for the entire make, but it is useful to know how to carry a float for either the upper or lower strand on both a knit and purl row.
To carry the lower strand on a knit row... Insert the right-hand needle into the next stitch as though to knit it, lay the lower strand over top of the right-hand needle, from back to front. Wrap upper strand as usual from front to back, so the strands are coming from opposite sides and cross on the needle. Next take the lower strand backwards off the needle, leaving the upper strand on the needle to finish knitting the stitch. Knit the next stitch with the upper strand to complete the carry.
To carry the upper strand on a purl row... Insert the right-hand needle into the next stitch as though to purl it, lay the upper strand under the right-hand needle, from front to back. Next wrap the lower strand from front to back, and then pull back upper strand off the needle, leaving only the lower strand on the needle to finish purling the stitch. Purl the next stitch with the lower strand to complete the carry.


_268_268_64_c1.jpg)


 Kntting Video")


 Kntting Video")
