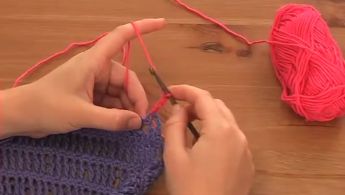
How to: Lazy Daisy
video by
Let's Knit Together
- Overview
- Practical Guides
This simple embroidery technique creates pretty flower shapes from loops radiating out from a central point, each anchored by a tiny stitch. It’s a quick way to add a floral design to any fabric.
Your flower can have as many petals as you like and be any size, from small and compact to a few centimetres in diameter, but bear in mind that the longer the loops of each petal, the greater chance of them being snagged and distorted during use. Four to six evenly spaced petals is usual, as you don’t want to stretch the central hole with too many threads, but it all depends on the thickness of the thread or yarn the flower is made from. You may want to use a slightly thinner yarn for the embroidery as it can look too heavy if in the same stitch as the main, and this is where embroidery thread is handy, as not only does it come in every colour imaginable, as well as metallic or multicoloured threads, you can adjust the weight of the overall appearance by choosing how many threads to use. Thread a tapestry needle with a length of yarn (or several strands of embroidery thread). A lazy daisy takes more than you might think, so try with 50cm and hold it double to start with to avoid having too long a tail to pull through. Decide on the size and number of petals for your flower, using the rows and columns of stitches as a guide. Pick an existing gap in or between stitches for the daisy centre, then secure the yarn by running it through a few stitches at the back. Bring your needle up from the underside through the centre hole and then take it back down again through the same one, leaving a loop of single thread on the surface at the size you want your petal to be. Bring the yarn back up and just inside the top of the loop and make a small straight stitch over the top and back down again, so that the loop lies flat. This has made the first petal. There’s no need here to be concerned about going down through an existing hole, as it’s likely that the straight stitch will need to split the yarn – you don’t want the petal too loose, just enough to hold it in a nice shape. Bring the needle back up through the central hole and make another petal in the same way, keeping the overall desired shape in mind. Carry on to complete the flower shape, then fasten off at the back. A twisted thread can distort the shape of the petal, so keep an eye on this and make sure all your loops are even and lie flat. Likewise, if the loops vary in tension slightly, it is possible to tease the strands along a little, although beware of splitting the strands too much. It’s best to remake a rogue petal than let it spoil a motif. TIP If your embroidery yarn starts to swizzle up, let the needle dangle freely and it will untangle – but be ready to catch your needle if it’s likely to slip off! If you’re likely to have to wash the embroidered item, test a sample of yarn or thread on a tension square of knitting in the wash. You don’t want one to shrink more than another, or one to colour the other. Yarns will have care instructions, and good quality embroidery threads will do, too. Combine with other embroidery stitches to make more of a lazy daisy. Create a stalk from chain stitch, and add simple leaves again with a lazy daisy loop, or more solid versions with satin stitch.


