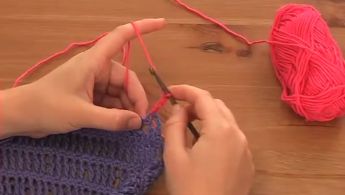
How to: work a buttonhole (vertical)
video by
Let's Knit Together
- Overview
- Practical Guides
This discreet buttonhole is created from the gap between stitches, as you drop the main ball of yarn and pick up on the other side with another strand. Here, the size of your buttonhole is determined by the height of your stitches.
Your button should always be larger than your buttonhole, otherwise it will slip through the hole too easily.
Buttonholes can be worked on a separate band or within the main fabric, and for this method you’ll need to wind off some of your main ball. The slit for a vertical buttonhole is produced with an extra section of knitting on the other side of the hole, but only on buttonhole rows, so this is not usually a substantial amount of yarn. In the video demonstration, the vertical buttonhole is made in the centre of a stocking stitch band using a contrast colour for clarity. It’s usual to join in the extra yarn a couple of rows below the start of the buttonhole to ensure the second ball is securely knitted in and won't unravel with the action of buttoning and unbuttoning. Follow your pattern up to this point. Change to the second ball of bobbin of yarn, twisting together by bringing new yarn up and under old, to avoid a hole forming, then knit to the end. Turn, ensuring yarns are not tangled, and purl to the join. Here, change back to the main ball, twisting together by bringing new yarn up and under old and purl to the end. The next right side knit row is where you'll begin the buttonhole. Knit to the second ball, but then simply drop the main yarn and pick up the second without twisting the strands together. This will create the buttonhole gap between the two separate balls. Knit to the end of the row using the second ball. Purl the next row in the same way, just switching back to the main ball on the other side of the slit. The buttonhole is now two rows high. Repeat the last two rows with the individual balls to make the buttonhole the correct height. On the next knit row, purl across all the stitches with the main ball only. Keep your tension firm over the slit. You can now cut the second ball, having completed the vertical buttonhole. Work the next purl row carefully over the gap to ensure an even tension and weave in the ends of the second ball. If you’d like to try out this technique, work this short pattern on 4mm needles and with a smooth DK yarn. You can make several buttonholes, just work a couple of rows before beginning the next buttonhole row on the right side. Sample vertical buttonhole Cast on eight sts in main yarn ball Work in stocking stitch (k one row, purl one row) until the work measures 3cm, ending with a purl row Buttonhole row 1 (RS): k4, change to second yarn ball twisting strands together to avoid a gap, k to end Buttonhole row 2: p4, change to main yarn ball twisting strands together to avoid a gap, p to end Buttonhole row 3: k4, drop main yarn ball and pick up second yarn ball without twisting strands together, k to end Buttonhole row 4: p4, drop main yarn ball and pick up second yarn ball without twisting strands together, p to end Repeat the last two rows as required for your button size ending on a purl row and bearing in mind that the slit should be smaller than your button Continue in main ball only in stocking stitch, keeping firm tension over the initial buttonhole rows Cut second ball and weave in ends securely


