How To Work a Tubular Cast On
video by
Neti Love & Julie Peasgood
- Overview
- Practical Guides
In knitting, there is more than one method for a tubular cast on, but this particular version is ideal for a pattern with a 1x1 rib, as it leaves a wonderfully rounded edge and the rib goes right to the end of your fabric, without the braid effect of some other cast ons.
This technique begins with a simple cast on in scrap yarn that is the same weight as your project yarn. Create an even number of stitches that is half the number required for a full rib row. So for a sample of 16 stitches, cast on eight stitches with the backward loop cast on.
To do this, make a slip knot and place it on a knitting needle held in your right hand. Hold the working yarn in your left hand and simply push your thumb under the working yarn, so the strand to the needle is at the back, and the working yarn lays across the front. Hold your thumb out to tension the strand. Bring the knitting needle under the yarn at front of the thumb and slip the loop off and onto the needle, tensioning the stitch by stretching out your thumb. Repeat to cast on the stitches needed, then cut the waste yarn.
Note that these stitches are quite loose as they are not bound in with as many twists as other cast ons. Join in your project yarn and, beginning with a purl row, work four rows in stocking stitch. Take care not to split your scrap yarn on the first purl row as this makes unraveling it difficult.
The next stage of this cast on is to double the number of stitches by alternately purling one stitch, then picking up and knitting a loop from the first row. This also sets the 1x1 rib.
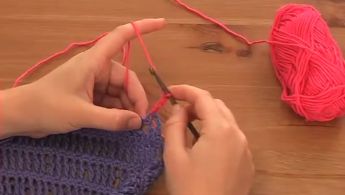
On the next (5th) row, purl the first stitch. Move the yarn to the back and pick up the first new stitch by inserting the right-hand needle through the side of the first loop in Row 1 of the project yarn – you can tell you have the right loop as it is attached to the tail. Insert the needle from bottom to top, place this loop on the left-hand needle and knit this stitch.
Next, bring the yarn to the front between the needles and purl one stitch. Take the yarn back and insert the right-hand needle from top to bottom to pick up the purl bump in Row 1 of the project yarn, slip this loop onto the left-hand needle and knit to make a new stitch. Rep across the row. At the end, be sure to work the very last purl bump, as otherwise you won’t have secured this stitch and when you remove the waste yarn your knitting will unravel. Check you have the correct number of stitches at the end of your row and have finished by knitting the last purl bump. At this point, you will have rolled the edge and created the first row of your 1x1 rib.
Continue with 1x1 rib, beginning with a purl stitch in this example and remembering to move your yarn between the needle tips as you alternate between the stitches. After two rows, you can remove the waste yarn by cutting the first stitch and unraveling it. If the waste yarn is caught in any stitches, you may need to carefully snip it out.


