How to Create Embroidery Smocking
video by
Neti Love & Julie Peasgood
- Overview
- Practical Guides
Smocking is a traditional way of gathering fabric while still allowing it to stretch, and this embroidery technique dates back possibly as far as the Middle Ages. It can be worked as bound stitches during knitting, or as we are going to show here, added easily over rib pattern after knitting, with contrast yarn for a distinctive look.
The rib pattern shown in the video is one knit stitch separated by three purl stitches (1x3 rib), with six rained ribs and purl stitches at each outer edge. Adding smocking contracts the overall width of the piece, and how much by depends on how tightly the binding strands are drawn in. For an ‘even’ look on the 1x3 rib shown, binding is offset on the right side of every fourth row, leaving three ‘clear’ rows. If your pattern does not say, base the row spacing on the total number of stitches in the rib pattern, which in this case is: 1+3=4.
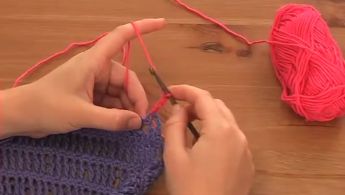
Using a contrasting thread in a blunt tapestry needle, work from the bottom up and from the right-hand side. Secure the contrast yarn on the wrong side, and bring the needle up through to the right side in the gap between the purl and knit columns. Working from left to right, take the thread over two adjacent ribs, and down to the wrong side in the gap between the knit and purl columns, in line with where the needle came up.
Repeat this action, so there are two neat strands across the two ribs, and the tapestry needle is at the back. Pull on the yarn to draw the ribs together.
TIP: After a few initial stitches, even up the binding by easing it with a tapestry needle to establish a consistent look. If it is too loose or too tight, simply unravel gently and begin again.
Work along the row, smocking the ribs in pairs and keeping the strands tidy along the back. For a long row, fasten off and secure, and use a new strand for each line of embroidery.
To work the next line of smocking, move up four rows for a 1x3 rib. Offset the starting point on the adjacent rib to the smocking below to create the trellis pattern.
If there are an even number of raised ribs, as in the video sample, the smocking can be worked across the first and last ribs for an overall symmetrical look. An odd number of ribs means that there will always be an unused one at the end of a smocked row. If your pattern is not specific, you may also want to work out whether you can make your top and bottom lines of smocking mirror each other, and work out how many smocking lines will fit.
Have fun creating this classic effect or give it a modern twist with an unexpected yarn type or shade!


