How to: work a two-row buttonhole (horizontal)
video by
Let's Knit Together
- Overview
- Practical Guides
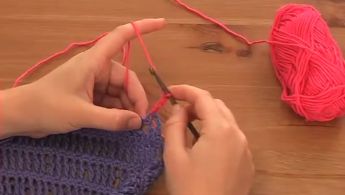
An easy way to make a horizontal buttonhole is to cast off stitches, then cast them back on again on the next row, this means that the size of your buttonhole is determined by the width of your stitches.
To cable cast on the stitches in this buttonhole, insert the right-hand needle between the last two stitches on the left-hand needle, wrap the yarn anticlockwise around the tip and pull the loop through to add one stitch. Repeat to add more stitches.
A buttonhole can sit within a band that is attached to a garment or be made within the main fabric, as might be the case for a bag flap, and can be horizontal or vertical. This horizontal buttonhole is worked along one row and is edged top and bottom with cast-off and cast-on stitches respectively. The type of yarn will affect the look of your edging with chunkier yarns producing a thicker edge than finer ones, which is then covered when the button is fastened. Casting on or off with a tight tension can also reduce the edging effect, but take care that this does not pucker your fabric in this area. For a chunky button you may need to work a different type of buttonhole with a deeper aperture. To work a horizontal buttonhole on the right side in stocking stitch, knit up to the point of the buttonhole. Cast off the number of stitches in the pattern to set the size and create the lower edge of the gap, then knit to the end of the row. Turn and purl back along the row to the gap. Turn and, with the right side facing you, cable cast on (see Expert tip) the equivalent number of stitches that you cast off. Turn back to the purl side and purl the next stitch tightly to close the buttonhole edge securely, then purl to the end of the row. Carry on with your pattern, keeping an eye on your tension in your first knit row across the buttonhole to ensure a neat finish. If you’d like to try out this technique, work this short pattern on 4mm needles and with a smooth DK yarn. You can make several buttonholes, just work a couple of rows before beginning the next buttonhole row on the right side. [can this be on a background tint or box?] [sub-head] Sample horizontal buttonhole Cast on eight sts. Work in stocking stitch (k one row, purl one row) until the work measures 3cm, ending with a purl row. Buttonhole row 1 (RS): k3, cast off the next two sts, k to end. Six stitches Buttonhole row 2: p3 (to gap), turn, cable cast on on two sts, turn, p to end. Eight sts Next row: k to end [ends]

