

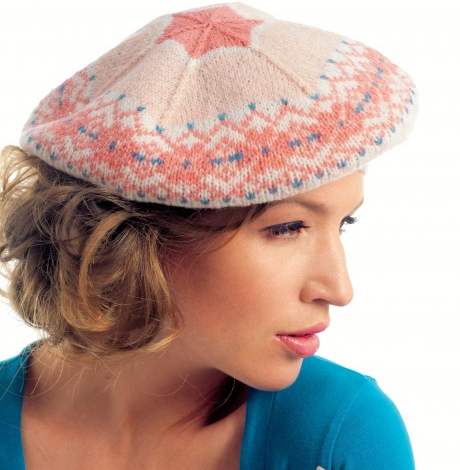
Become a Fair Isle master with the concluding part of our colourwork tutorial by Luise Roberts.
Over the past two months we have been taking you through the various techniques involved in Fair Isle knitting. We began with basic stranding before moving on to holding two colours in one hand, weaving and working in the round. In this third and final instalment, Luise Roberts demonstrates how to work with one yarn in each hand. This helps you keep track of where the floats lie which maintains a smoother fabric.
How to hold the yarn and knit with the left hand
Knitting with the left hand, known in the UK as the Continental style, is considered by some to be faster because the movement is more economical. However, the tension is often looser than that of right-handed knitters. This is partly because the potential speed means that each stitch has less attention but also because the picking action of the RH needle is less defined by a set position and is more fluid.
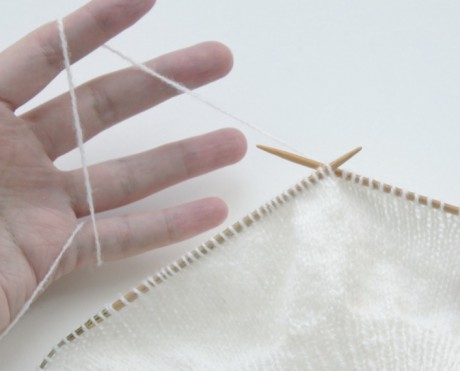
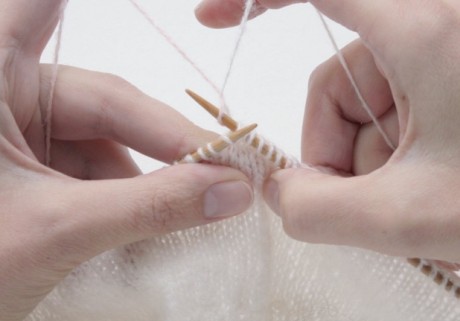
Step 1: holding the yarn.
Wrap the yarn around the fingers as shown. The idea is to be able to grasp the yarn and control the flow through the fingers. The LH needle is held with the thumb and middle finger.
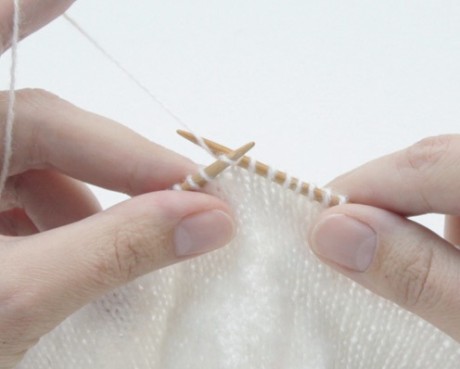
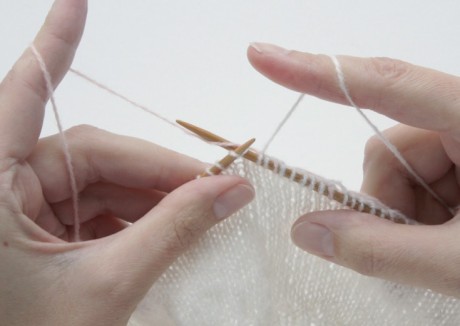
Step 2: knitting
Insert the RH needle into the next stitch and manoeuvre the tip of the needle from back to front and from right to left around the strand of yarn being held taught in the left hand. Draw the tip of the RH needle through the stitch, hooking the loop at the same time, then drop the stitch off the LH needle.
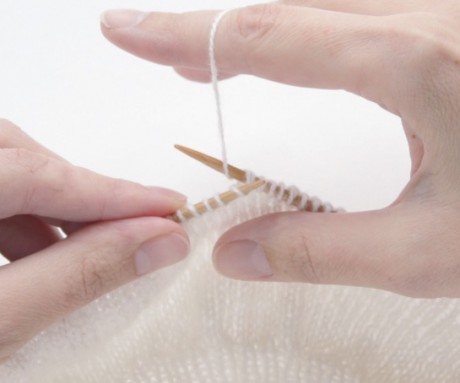
How to hold the yarn and knit with the right hand
Knitting with the right hand also has many benefits. There is more control over the working yarn and tension, which means it is easier to produce an even fabric. However, the use of a small group of muscles by the right-handed knitter can mean that it is more likely that the rest of the body does not relax but becomes tense and painful.

Step 1: holding the yarn
Wrap the yarn around the fingers as shown. The important thing is the ability to control the flow of the yarn through the fingers and around the needle.
Step 2: knitting
Insert the RH needle into the next stitch. Stretch the index finger of the right hand towards the tip of the RH needle and wrap the yarn around the tip of the needle from back to front and from right to left. Draw the tip of the RH needle through the stitch, hooking the loop at the same time and drop the stitch just worked off the LH needle.
Helping hand
Holding the yarn and knitting with the less dominant hand, usually the left, will feel very awkward at first but practice makes perfect. Try working a few rows with each hand until you feel comfortable with both. Take your time working the rows in your less dominant knitting hand and don’t rush. The tension may vary slightly from hand to hand but as long as it is only slight and you keep moving the yarn from one hand to the next, the properties of the yarn should ensure that the difference in tension is not too noticeable. Remember though to work your tension swatch with both hands too.
How to strand and weave Fair Isle motifs using both hands

Your dominant knitting hand should do most of the work, so use it to knit the colour that has the most stitches or will be used for weaving in the most floats. Be consistent about which yarns are in which hand and do not be tempted to change hands. Hold the designated yarns in the preferred hands and knit from the chart using the hand that is holding the specified colour.
Using the working (pink) yarn held in the left hand to weave in the float (white) yarn held in the right hand
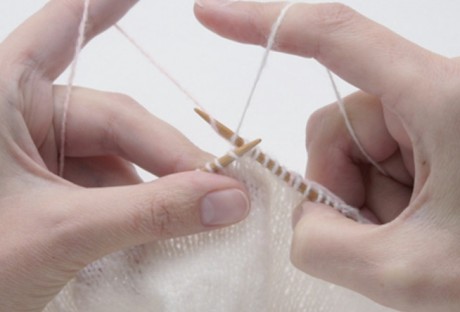
Step 1: Insert the tip of the RH needle into the next stitch, with the right hand wrap the float (white) yarn around the tip of the needle as if to knit. Using the left hand wrap the working (pink) yarn around the tip of the RH as if to knit.
Step 2: Unwrap the float (white) yarn from around the RH needle and knit the stitch with the working (pink) yarn in the left hand.
Using the working (white) yarn held in the right hand to weave in the float (pink) yarn held in the left hand
Step 1: Insert the tip of the RH needle into the next stitch, wrap the float (pink) yarn held in the left hand around the tip of the RH needle from back to front and from right to left.
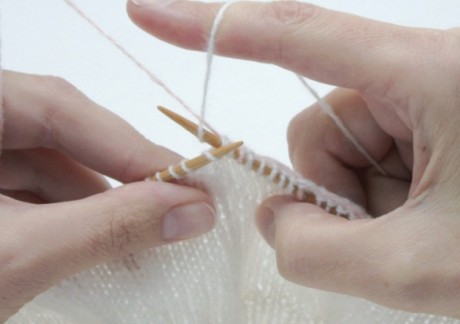
Step 2: Wrap the right-hand, working (white) yarn around the tip of the RH needle as if to knit. Draw the left-hand, float (pink) yarn away as the stitch is knitted with the right-hand, working (white) yarn.
Sort it out!
In Fair Isle it is important to check after each row that the stitches are evenly spaced and the stitches and floats are tensioned correctly. If they are too tight or slack, follow these steps to get back on track…
Float too tight?
Start with the last stitch of that colour knitted and pull it slightly drawing more yarn from the ball, continue along the row pulling each stitch of the same colour, easing the extra yarn to the point it is required.
Float too slack?
Begin with the first stitch at the end of the slack float and pull it slightly to correct the float. Continue along the row pulling each stitch of the same colour, easing the extra yarn until the extra slack can be taken up by the ball of yarn.
Stitches too tight or slack several rows down?
Ease the neighbouring stitches and floats of the same colour. If the work still looks uneven then ease all the stitches across the row. Leave any extra yarn as a loop hanging from the back. At the end of the project cut the loop and weave the ends in.
Wrong colour wrong place several rows down?
Drop the stitch off the needle immediately above the error and allow the chain of loops to unravel down to the mistake. Unravel that stitch then ease some slack from the nearest stitches in the correct colour and use the float to recreate the stitch. Using a crochet hook to pick up the loops, rebuild the column of stitches, being careful not to use a float rather than a stitch loop by mistake.
Do you have any tips for Fair Isle knitting? Why not share in the comments below?


_333_180_c1.png)
 Baby
Baby
 Toys
Toys
 Garments
 Crochet
 Homewares
 Dolls
Dolls
Share