

Improve your Fair Isle skills with the second installment of our colourwork masterclass! Read part one here.
Two weeks ago we introduced you to the basics of changing colour for Fair Isle and stranding the yarn across the wrong side of your work. Now we’re taking it one step further. Fair Isle knitting is most commonly worked in the round using circular or double-pointed needles. This means you don’t have to worry about tricky purl rows where you can’t see the motif, because you are always working on the right side. However, stranding is not always suitable when you have colour blocks of more than five stitches. When this is the case, we use a method known as weaving. LK Designer Luise Roberts shares her expertise in this fabulous guide. Look out for the concluding part of our Fair Isle tutorial in three weeks time where we will be looking at correcting mistakes and holding different strands in each hand.
Holding two yarns in the right hand
When working two colours in the round you can hold just the working yarn, and drop the colour yarn, but you’ll find it much quicker to knit with both yarns held in your right hand at the same time.
Holding the yarn
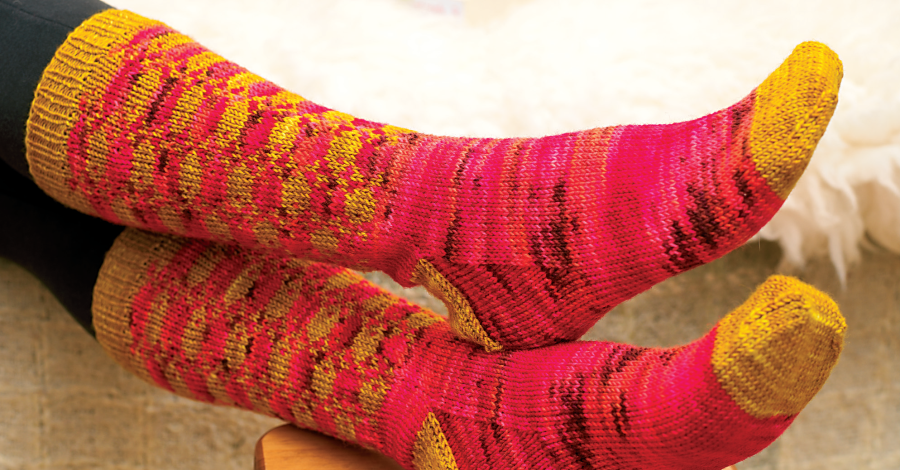
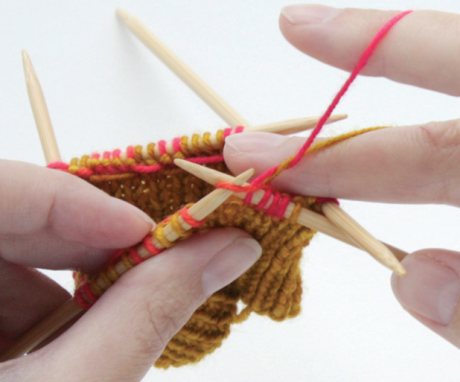
The sock cuff is worked in yellow and the red yarn is then introduced for the fish motif. To introduce red, hold both yarns ready to knit with as you would one yarn, with the yellow yarn nearer the tip of your index finger.
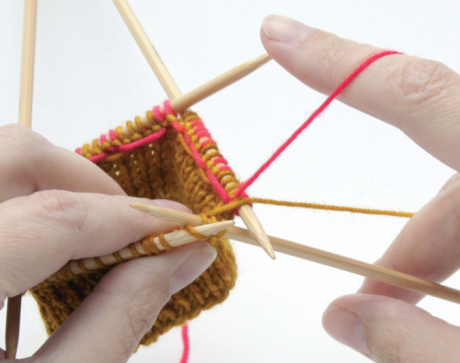
Step 1: Changing from the yellow (front) yarn to the red (back) yarn to work the first motif
Drop the front yarn from the index finger and tension it with the middle finger. Using your index finger select the back yarn (the first time you do this it will be behind the red yarn on the index finger, subsequently it will be on the middle finger) and pass it over the front yarn to knit the required number of stitches.
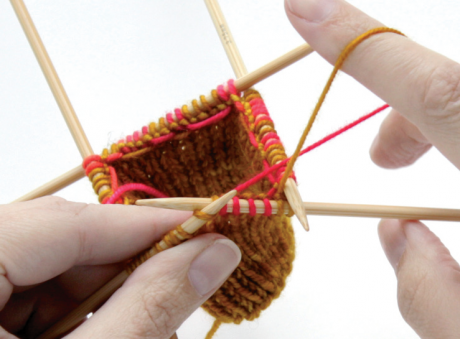
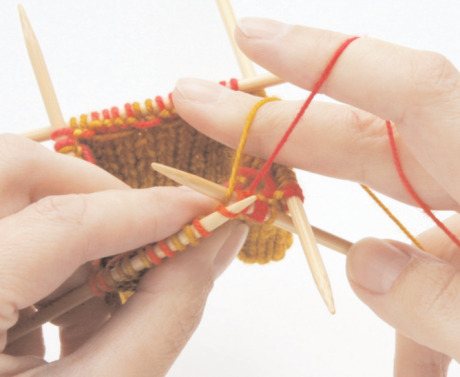
Step 2: Changing from the red (back) yarn to the yellow (front) yarn to work the second motif
Drop the back yarn from the index finger and tension it with the middle finger. Using your index finger, select the front yarn from the middle finger and take it from under the back yarn to knit the required number of stitches.
DON’T FORGET
Above or below
For a smooth, even finish on the RS and WS of the fabric, work the colours with the floats in the same relative position each time. For example, the red (back) yarn should always pass over the yellow (front) yarn each time it is introduced so the red float remains in the same place in relation to the yellow one on the WS of the work. Similarly, the yellow yarn should always be selected from under the red yarn.
Blocking
Blocking is an important stage in Fair Isle knitting. Turn the work inside out and with a damp cloth and a warm iron, gently press the floats on the reverse of the fabric. Take particular care with the fabric created between the double-pointed needles. The heat will help to smooth out
any minor unevenness.
Weaving in
In part one we examined the technique known as stranding, where each colour is carried across the back of the stitches until it is next required. However, when the blocks of colour span more than five stitches the floats become loopy and can snag, so we use the weaving method. This is where the float is looped under the working yarn to hold it close
to the fabric.
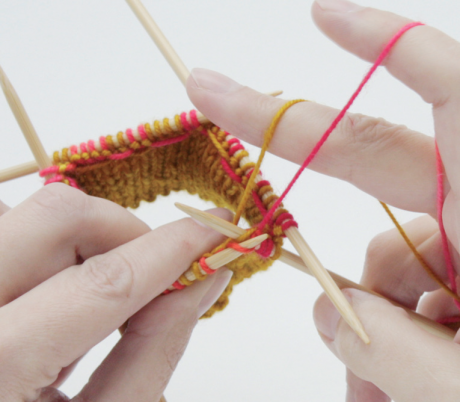
Step 1: Wrapping the float yarn around the needle
After three or four stitches of a long block of colour (red) have been worked, insert the RH needle into the next stitch, pass the float yarn (yellow) over the working yarn, and around the tip of the RH needle from top to bottom, right to left.
Step 2: Knitting the stitch with the working yarn
Wrap the working yarn around the tip of the RH needle as if to knit. Knit the stitch by holding the working yarn on the needle close to the base of the stitch and at the same time unwrapping the float yarn by passing the tip of the RH needle under the strand. The working yarn holds the float yarn close to the fabric and knits the stitch. You may find it easier to use the LH needle to lift up the yellow strand to help the RH needle pass underneath. Make sure that the float yarn is not visible on the RS of the work. Continue to work, strand and weave around the round.
NOTE: do not weave at the end of a row or on the last stitch before a colour change. The following stitches will help hold the float in place. Do not weave a float on the same stitch on every row as the slight change of fabric will show on the RS.
Alternative method
If you find Steps 1 and 2 tricky, try inserting the RH needle into the next stitch, first wrap the float yarn then the working yarn around the tip of the RH needle as if to knit. Unwrap the float yarn and knit with the working yarn. Particular care is required with this method to ensure the float yarn is not visible on the RS.
Weaving on a purl row
This follows a similar principle to that of weaving on a knit row or round but after inserting the RH needle into the next stitch, lay the float yarn over the tip of the RH needle then wrap the working yarn around the tip of the RH needle as if to purl, drawing only the working yarn through the stitch.
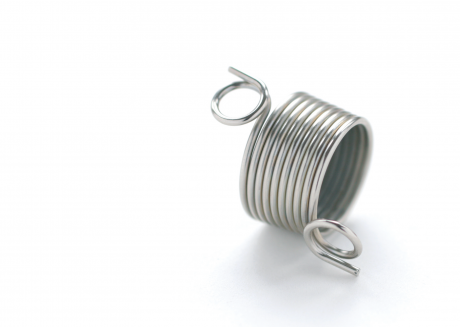
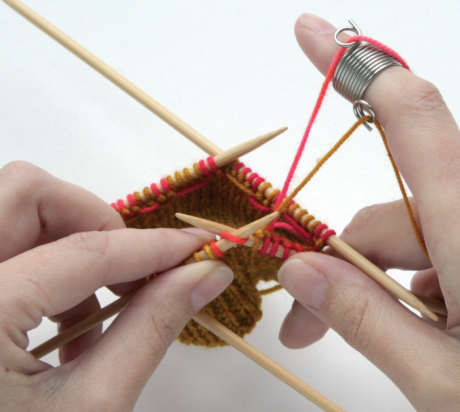
Tools of the trade
This Norwegian knitting thimble was originally designed for the picking action of knitting with yarn in the left hand but also makes separating the yarn strands in the right hand much easier. It can either be placed on the index finger with the middle finger used to guide the required strand into position or the other way round.
Variations on a theme
By looking closely at the position and structure of the stitch pattern you can come up with a more interesting project – just remember to knit and block swatches so you can compare your variations with that of the original project.
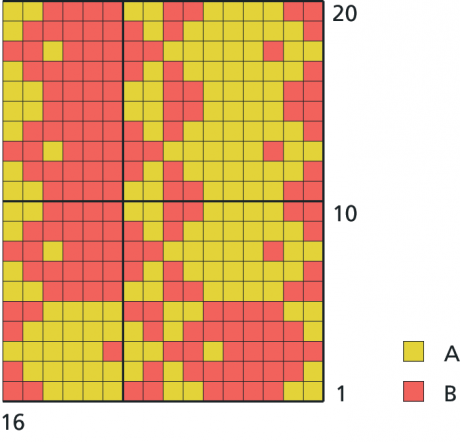
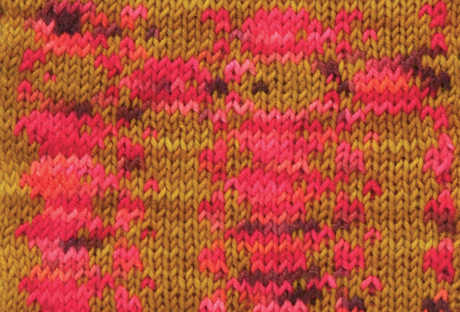
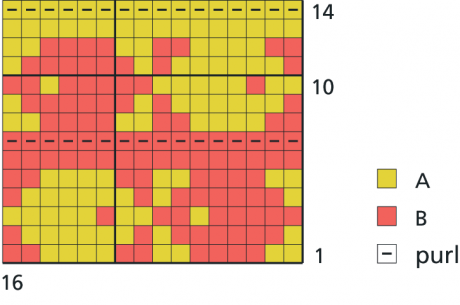
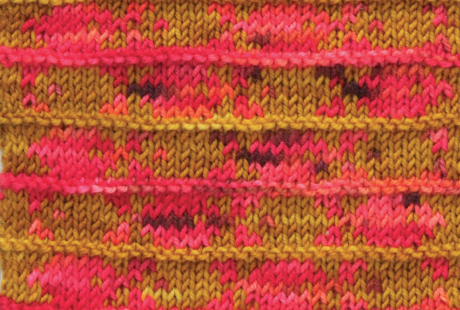
NOTE: as the socks are worked in the round every row on the chart should be read from right to left. The swatches are worked from the top down
1. Try repeating sections of the chart to create larger blocks of colour. In this case the chart was worked once then the first five rounds were repeated. This has little effect on the tension and the vertical stripes may be more flattering on the leg.
2. Adding a two-row stripe in a single colour gives a break from the Fair Isle knitting and increases the definition of the motif, while purling the second row introduces texture. Working the stripe in blue or green would continue the water theme. This will effect the stitch count slightly but not enough over 64 stitches to require any adjustment.
Love this tutorial? We’ll be publishing part three in three weeks time, where we will explain correcting mistakes and holding different strands in each hand.


_333_180_c1.png)

 Baby
Baby
 Toys
Toys
 Garments
 Crochet
 Homewares
 Dolls
Dolls
Share