

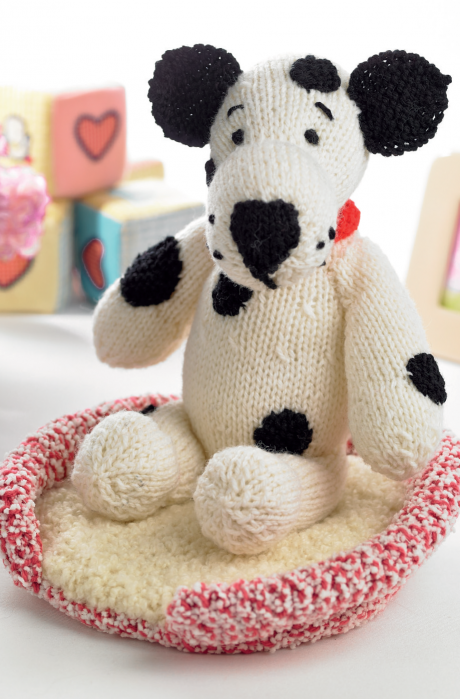
LK Designer and toymaker extraordinaire Val Pierce shows you how to create the perfect knitted playmate…
Cuddly toys and cute characters make perfect gifts for children and the young at heart. They usually only involve basic knitting and shaping techniques so are well suited to beginner knitters, but they can be tricky to put together. You don’t want to spend all that time knitting only to end up with a wonky or holey toy because you’ve not stuffed or sewn it together in the best way. Our amazing designer Val Pierce is an expert when it comes to knitted toys. Here are her top tips on how to give your projects a professional finish. Part 2 can be found here
Author: Val Pierce
The design stage
Before starting your project it is very important to consider the age of the child that you intend to give the toy to. Remember, tiny babies and even young toddlers will constantly put things into their mouths so you will need to make sure everything is securely fastened and there are no safety hazards. The younger the child, the more simplistic the toy should be. Bold, bright colours, different textures and easy to hold shapes are perfect for tiny babies. If the toy is for an older child, you can make the project much more elaborate.
Choose the yarn
When you have chosen the design, the next step is to select your yarn. Normally patterns will suggest an appropriate yarn but you may wish to substitute the yarn or use up oddments from your stash. Again, think of the age of the child you are making the toy for. Projects for little ones will need to be washed quite frequently so it is sensible to use a good quality yarn that is machine washable. Eyelash or metallic yarns work well on toy projects but as the fibres may shed, they are best suited to older children as opposed to babies.
Start knitting
Knitted toys are usually made up of lots of smaller pieces which will later be assembled to create the finished character. Take as much care making the pieces as you would for a garment. This will help make sure that the arms and legs are the same size, the clothes fit properly and the whole toy looks in proportion when finished. It is always better to count the rows on each piece, rather than rely on an exact measurement. Most toy patterns are knitted in either garter stitch or stocking stitch using smaller needles than recommended for the weight of yarn. This produces a firmer, tighter fabric that will not stretch too much when stuffed and will prevent the stuffing showing through on the finished toy.
Assemble the pieces
Sewing the fabric together can be done using more than one method:
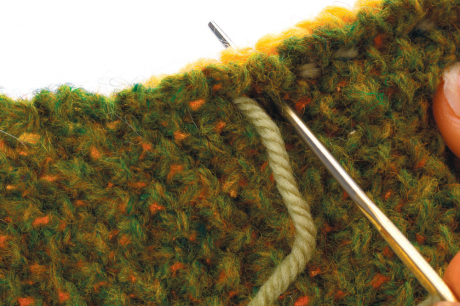
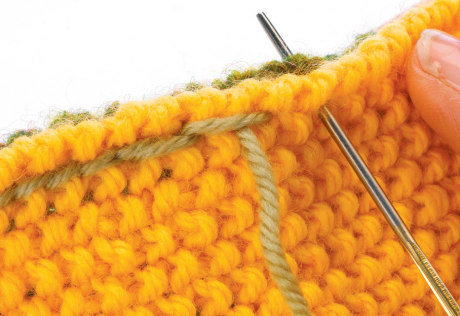
Mattress stitch on garter stitch
Garter stitch pieces looks much neater when sewn together on the right side of the fabric. Lay the pieces flat side-by-side and match the row ends.
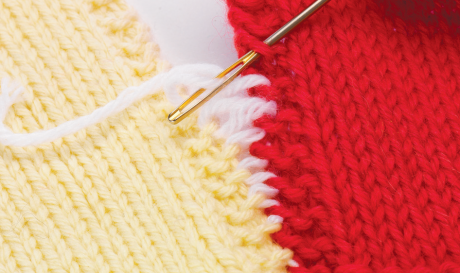
1) Insert the yarn needle beneath the horizontal raised ‘bumps’ of the garter stitch on each piece.
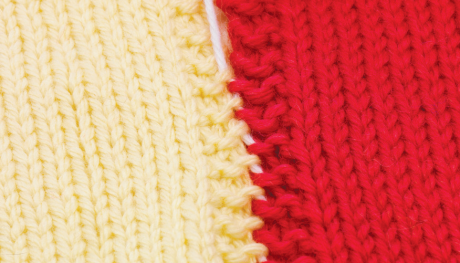
2) Pull the yarn firmly to draw the pieces together. This gives a neat, flat and almost invisible join.
Mattress stitch on stocking stitch
Stocking stitch pieces can be joined in a similar way

1) Insert the yarn needle between the ‘v’ of the stitch and pick up the horizontal bar in the centre. Do this on each piece.
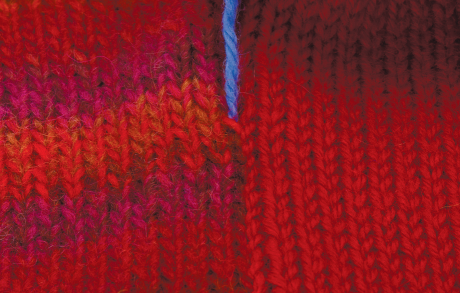
2) Pull the yarn to close the gap. This gives an invisible seam and allows you to match stripes and patterns easily.
Backstitch
Another sewing stitch often used is backstitch. This is worked on the wrong side of the fabric, and gives a small neat ridge. It is more bulky than the other two methods of seaming but can be very strong so is a good option when you need to add strength to a particular join.
How to do it: place fabric with RS together, starting at one edge insert the needle through the fabric and bring it out approximately 5-8mm along. Re-insert needle midway between initial entry point and where the needle has just come out. Repeat this along edge.
Reverse angle:
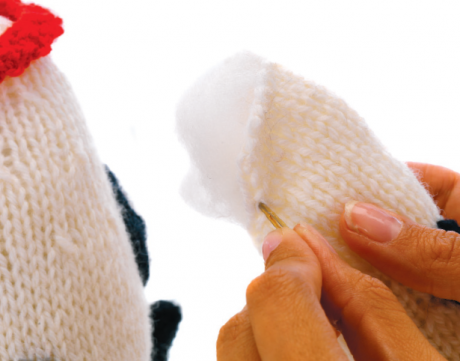
Stuffing
Sewing up complete, it is time to stuff the individual body parts. Most parts will need to be stuffed quite firmly so they hold their shape. Do this by adding a small amount of stuffing at a time and pushing it well into the base of the part you are working on. Make sure you use certified safety stuffing. Tease out each piece to make it more pliable and give a smoother effect. Try to stuff each part equally, so check legs and arms against each other as you work to make sure that they match. Don’t over stuff pieces as you need to be able to sew limbs to the body and if they are too full there will be no spare fabric to use. Hands and feet will need extra stuffing and shaping.
Overstuffed…
Understuffed…

Uneven stuffing…
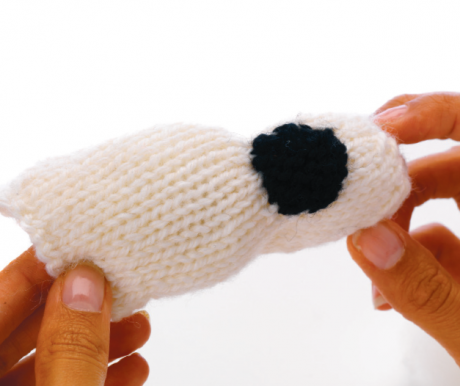
Too full to sew up…
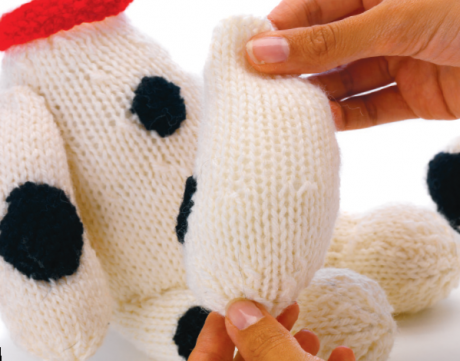
Shaping the head
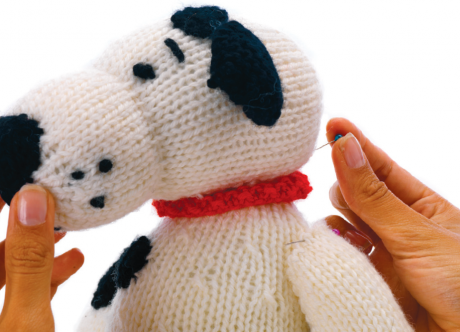
When it comes to character toys, such as animals or dolls, heads are often problematic as they need to be shaped to give the best possible result. Look at the picture of the toy you are making, check out the shape and the places where extra stuffing may be needed. Take care and work slowly, frequently checking that the head isn’t becoming too big for the body and vice versa, as you want the toy to be stable and not top-heavy. Loosely tack the head onto the body to see how it sits and if it is in proportion. You can always take out or add more stuffing at this stage. Shape and stuff as you work, pushing more into areas like cheeks and noses. Don’t attempt to sew on any features until you are quite satisfied with the shape of the head.
Pin or tack head in position to check placement and alignment on body


 Baby
Baby
 Toys
Toys
 Garments
 Crochet
 Homewares
 Dolls
Dolls
Share