

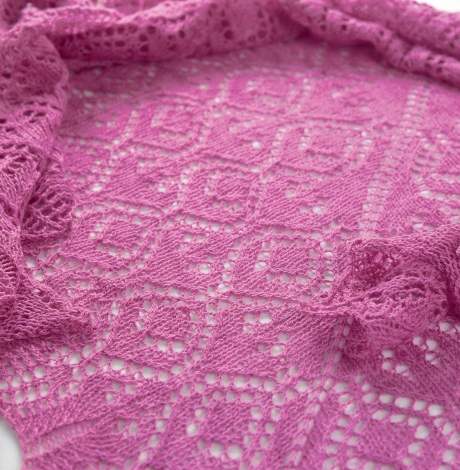
Discover the wonderful world of lace knitting with our handy tutorial
For novice knitters, the thought of deliberately making holes in your work can be hard to understand, but it quickly becomes clear when you see the gorgeous garments and accessories that can be made using lace techniques. The holes, or eyelets as they’re more commonly called, are created by working increases, in the form of yarn overs, paired with decreases. This means you have the same number of stitches but end up with eyelets that can then be incorporated into various designs and teamed with stocking stitch to produce beautiful lacy knits. This tutorial provides you with a useful step-by-step guide to the basic stitches. Pick up a copy of Let’s Knit’s July issue (on sale now) for lots of lovely lace project, yarns and tutorials!
To the point
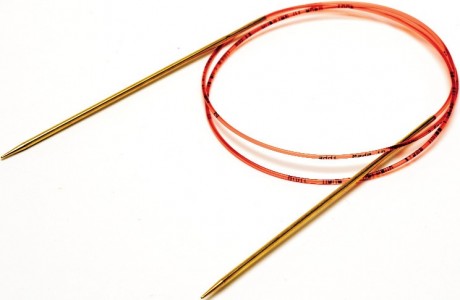
Lace garments are generally worked on small straight needles, but shawls, due to their length, are more often worked in rows using circular needles.
Casting on
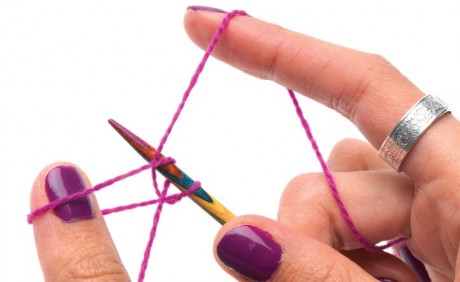
Some knitters prefer to use a special lace cast on but the long-tail cast on, also known as the Thumb method will suffice for the majority of your lace knitting needs.
Step one: Make a slip knot, leaving a long tail. Each stitch to be cast on requires around 2cm of yarn so make sure you measure out enough before making the slip knot. Hold the ball end in your right hand and stretch the tail end out to the left of the needle. Hook your thumb over and under the tail strand to create a loop.

Step two: Insert the needle into this loop and wrap the ball end around the tip of the needle as though you were knitting the stitch.
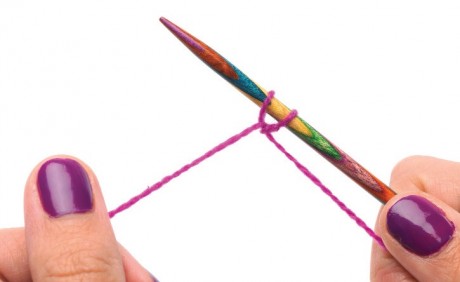
Step three: Bring the needle back through the loop on your thumb and pull tight. Repeat steps one to three until you have cast on the correct number of stitches.
Casting Off
A stretchy cast off is best suited to lace work. LK Designer Anniken Allis recommends using the
Russian Cast Off: k2, slip sts back onto LH needle, k2tog, * k1, slip sts back onto LH needle, k2tog, rep from * to end.
Lace increase stitches (yarn overs)
There are three commonly used increase stitches in lace knitting and which one you use depends on the stitches before and after the increase. If you are instructed to make more than one increase, just wrap the yarn around the needle more times. Some patterns refer to all three as simply ‘yo’ but this is how to break down the techniques.
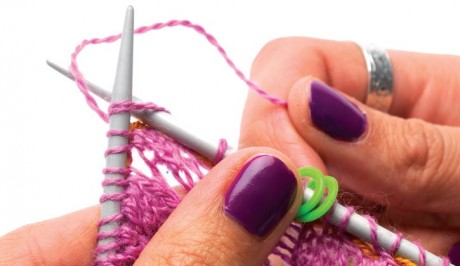
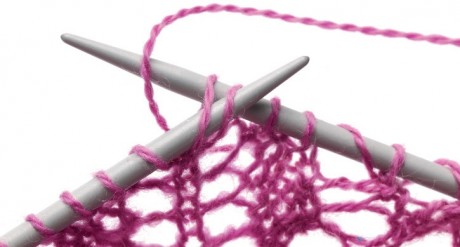
Yfwd (between two knit stitches)
Step one: Bring yarn to the front of the work between the two needles
Step two: Take the yarn over the top of the right-hand needle and knit the next stitch
Yon (between a purl and a knit st)
As the yarn is already at the front of the work, insert the tip of the right-hand needle into the next stitch, then take the yarn over the top of the right-hand needle and complete the stitch

Yrn (between two purl stitches or a knit and a purl stitch)
As the yarn is already at the front of the work, take the yarn over the top of the RH needle and bring it back between the tips of the two needles ready to purl the next stitch
NOTE: if you are increasing between a knit and a purl stitch, you will need to bring the yarn to the front between the two needles before making the yrn
Lace decrease stitches
Every increase in lace knitting is counterbalanced by a decrease. These are used to shape the individual lace motifs because some cause your knitting to slope to the left and some to the right.
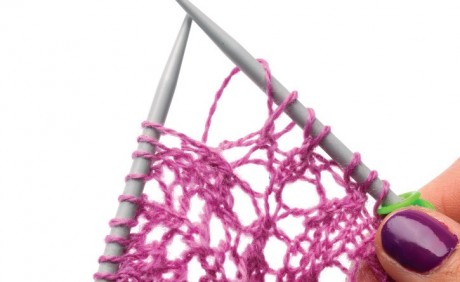
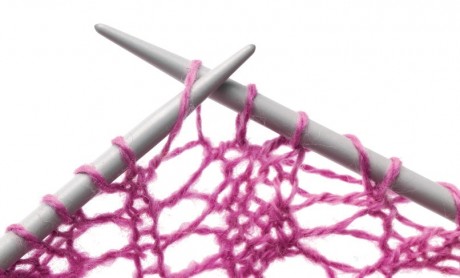
K2tog (right-leaning decrease)
Insert the right-hand needle into the next two stitches knitwise and knit them both together
NOTE: the same principle applies no matter how many stitches you are asked to work together
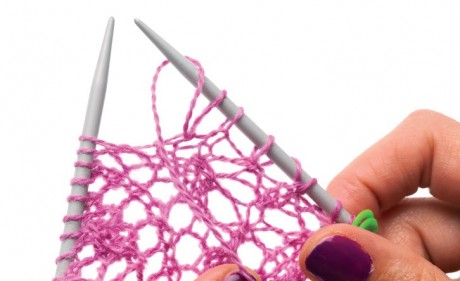
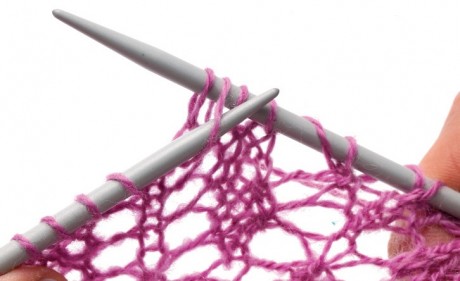
Ssk (left-leaning decrease)
Slip two sts kwise from the left- to right-hand needles. From the left, insert the left-hand needle into the fronts of these stitches and knit them both together
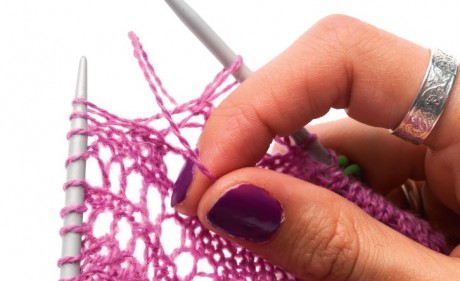
Sl 1, k1, psso (left leaning decrease)
Step one: Slip the next stitch knitwise from the left- to right-hand needle
Step two: Knit the next stitch. Insert the tip of the left-hand needle into the slipped st and pass it over the top of the knitted stitch and off the end of the right-hand needle
Sl 1, k2tog, psso
NOTE: This will decrease two stitches without leaning in either direction and is often used over the central stitches in a motif. To work it, simply combine the techniques for skpo and k2tog
Top tips
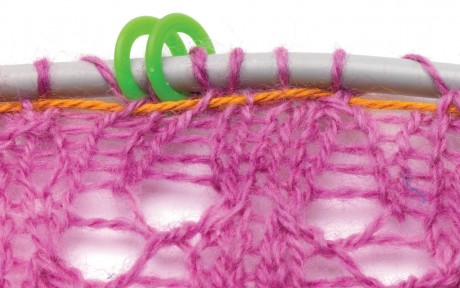
O marks the spot
It often helps to place round stitch markers after every pattern repeat to help you keep your place and show where the motifs lie.
Super saver
Lace is notoriously difficult to unpick so try using a life line. After you’ve completed one full pattern repeat, insert a length of thin contrasting thread or yarn through the stitches on the needle, making sure enough hangs out at each end. Do not go through any markers. Once it’s in place, continue knitting as before but if you make any mistakes, you can just frog back to the lifeline instead of having to unpick the whole lot. At the end of the next repeat section, move the lifeline or simply insert a new one.
Blocking
One of the tricky things about lacework is that it can be difficult to clearly see the pattern while you work. It only looks its best when it has been blocked. For delicate items like lacework, we recommend using spray blocking.
Chart-breaker
Some knitters find charts quite intimidating and prefer to work from written instructions, however, when it comes to lace, this is not necessarily the best option.
If you look at the symbols on a lace chart you will see that they actually resemble the motif on your knitting, making it much easier to keep your place and see how the pattern is formed. There should always be a key provided to show you what all the symbols mean, and their shapes will generally reflect the shape of the stitch you create (so, for example, ‘yarn forward’ is usually a circle, ‘k2tog’ is usually a right-leaning slash, etc). With all knitting charts, whether for lace or cable, you start at the bottom and work up, reading right-side rows from right to left, and wrong-side rows from left to right, unless otherwise stated. Often there may be a section highlighted as a ‘pattern repeat’, and you will be instructed to repeat this part a specific number of times before you continue with the rest of the row. You may find it useful to photocopy and enlarge the chart so you can highlight the rows as you knit them.


_333_180_c1.png)
 Baby
Baby
 Toys
Toys
 Garments
 Crochet
 Homewares
 Dolls
Dolls
Share