

Our fabulous guest blogger The Twisted Yarn shares an extra special camera strap pattern for digital SLRs.
Hello? Hello?
Am I in the right place? This is the Let’s Knit blog, yes? May I come in?
Nice to meet you. Shall we sit over here by the fire? I don’t suppose there’s any green tea going? I do like your jumper, by the way; did you knit it yourself?
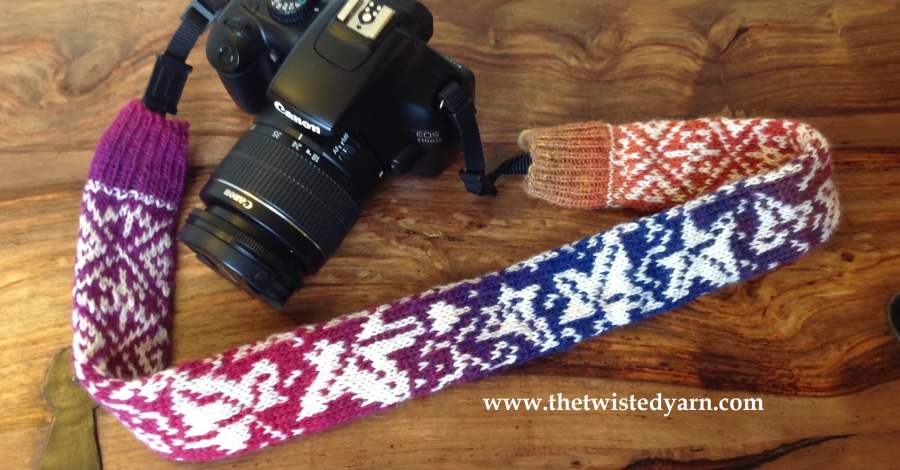
So tell me, are you ready for Christmas? Ooh, you’re well ahead of me – I’m so disorganised. I’ve got a good present idea, though, that you could knit for the photographer in your life. Or maybe you’re keen on photography y’self, in which case you might be able to use one of these for your camera. Pretty, no?
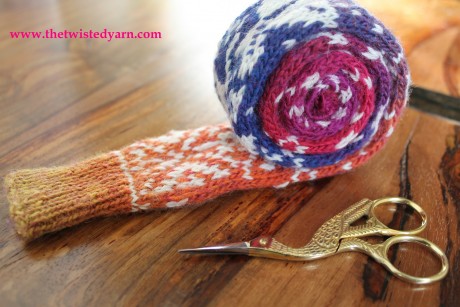
The thing is, the straps that come with digital SLR cameras these days are a bit uncomfortable, and they’re not exactly beautiful. Time to do summat about this, I think. What I’ve designed is a stranded cover for the wide part of the strap. And having figured out the basics, I was staring out of the window, pencil in hand, wondering what sort of pattern should be on the strap, when my idle gaze fell on the ivy sprawling up our garden fence. Must do something about that wretched ivy, I thought. So I did. I put it on the camera strap. Ha! And on the other side, I doodled a happy, abstract pattern. If you want to create your own design for this pattern, I’ve got some tips here. Being a stranded design, the resulting fabric feels quite thick, making for a nice comfortable strap.
Would you like to make one? I’m happy to share the pattern, in exchange for a bit more of that green tea.
First, some basics. The finished work in the pictures measures 73x4.5cm, and should fit over the wide part of most standard straps (but the length can be adjusted for any model).
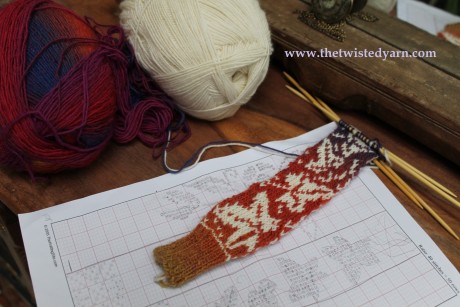
Yarn: one ball of Rico Design Superba Poems, in Tropic (Yarn A in the pattern below). One ball of Rico Design Bamboo Uni, in Ecru (Yarn B).
Needles: one set each of 3mm and 3.5mm double-pointed needles (DPNs).
Tension: 30 sts, 42 rows to 10cm square in stockinette on 3mm needles. But really, I wouldn’t get too hung up on precise gauge for this project.
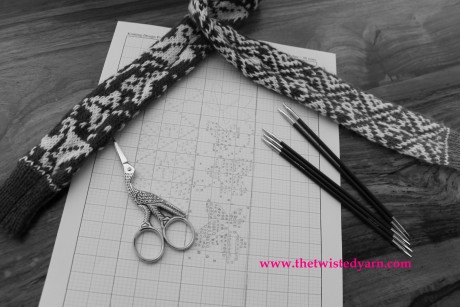
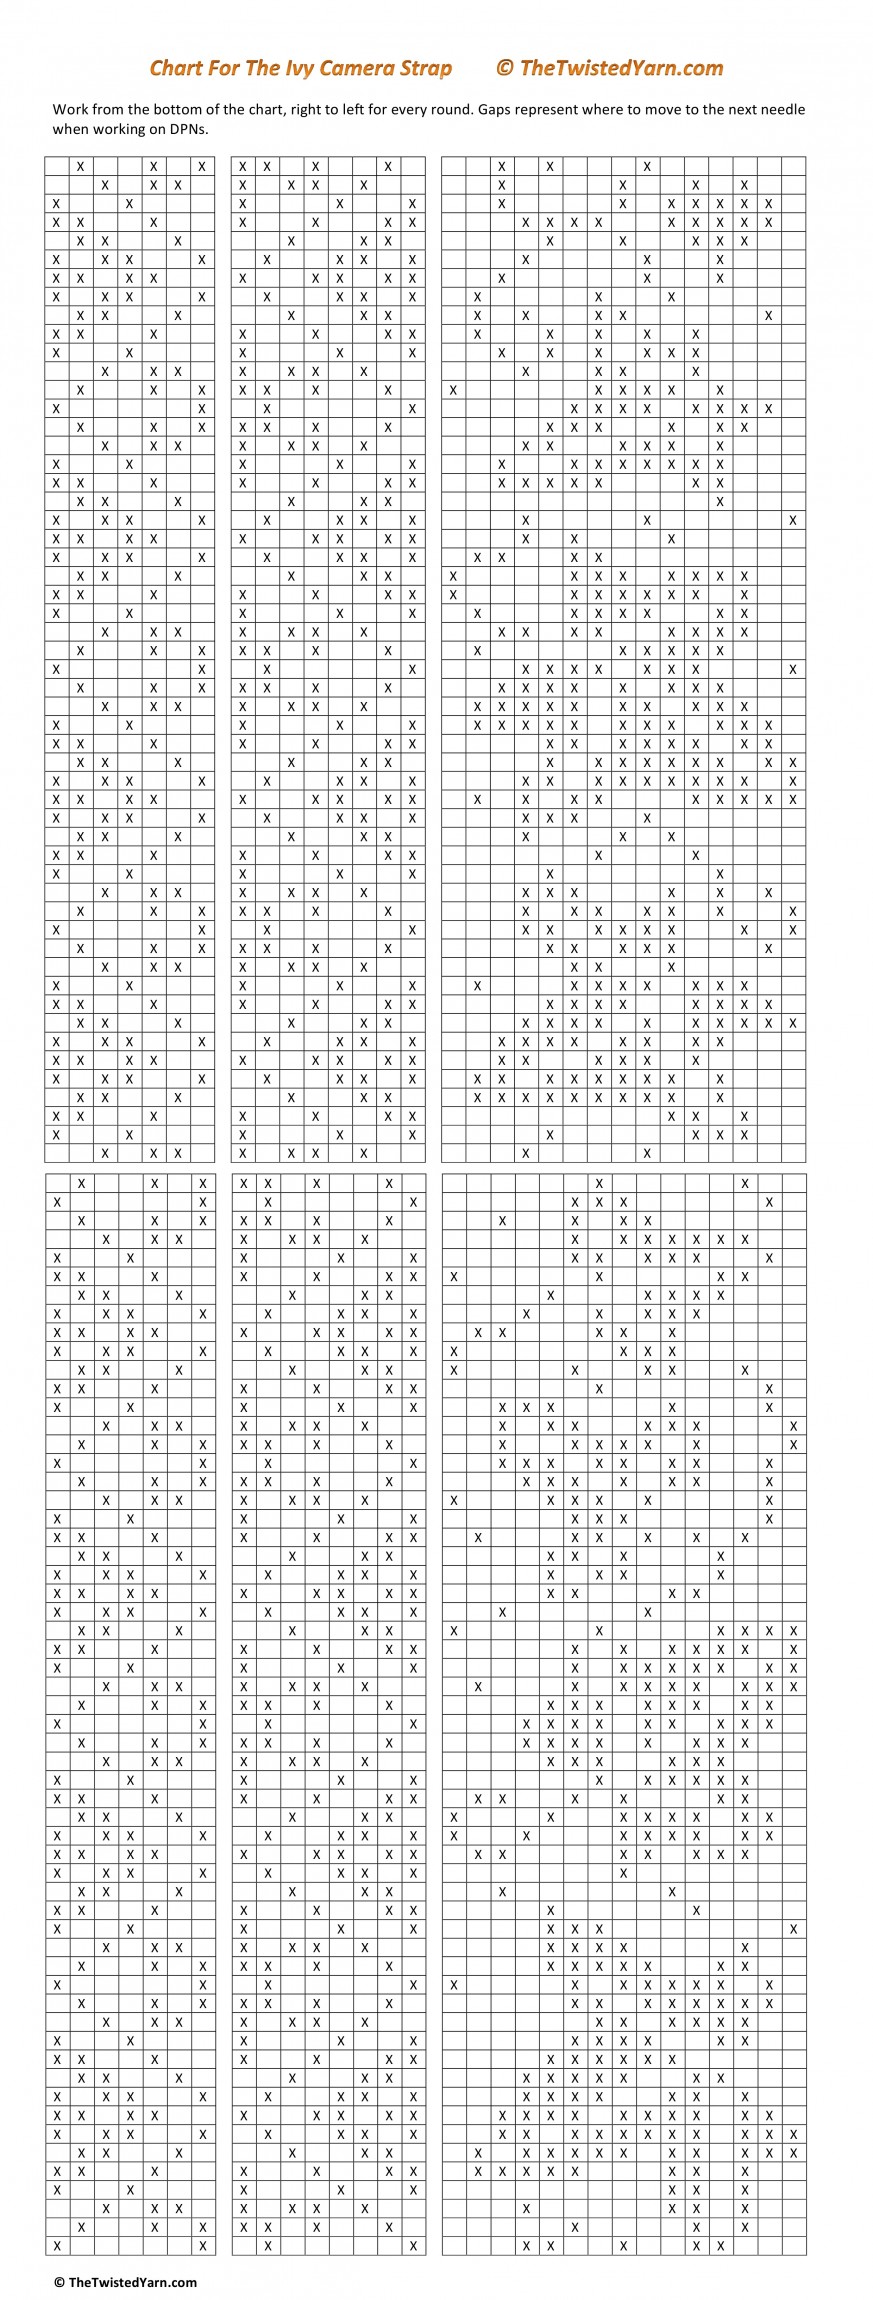
Chart: the image can be found in full here, or if you prefer you can download PDFs of the pattern and the chart here.
Right, off we go!
Cast on 30 sts on 3mm needles in yarn A. Divide stitches between three DPNs as follows: 15 sts on first needle, 8 sts on second needle, and 7 sts on third needle. Join in round. Fetch tea, and some of your very best biscuits. Settle y’self in your comfiest chair.
Rnd 1: * k1, p1, rep from * until end
Rnds 2-18: as Row 1, to create a band of 1x1 rib
Rnd 19: drop yarn A, introduce yarn B and k all sts around (as you remove each 3mm needle, replace it with a 3.5mm needle, until you are working exclusively with the larger size)
Rnd 20: drop yarn B, pick up yarn A, and k all sts
Rnd 21 onwards: begin working from bottom right of Chart, using the coloured yarn A for the background, and cream yarn B for the leaves and pattern details (marked as ‘X’s on the chart). Work in the round from right to left on every row of the chart, with 15 stitches on first needle being used for whole of ivy design panel, and abstract pattern on reverse being split between needle with eight stitches and needle with seven stitches. OK? Yeah? When you reach top of pattern chart, pour yourself some more tea and start again from the bottom. Continue until you’ve worked the length of the wide part of the strap. In my case, I worked just over one and a half repeats of the chart.
Next rnd: drop yarn B, k in yarn A
Next rnd: drop yarn A, k in yarn B (as you remove each 3.5mm needle, replace it with one of the smaller 3mm needles until you are just working on the smaller needles)
Next 18 rnds: * k1, p1, rep from * to create second cuff in 1x1 rib
Cast off, weave in ends
Wash and block. All manner of unevenness and dodgy stitches will magically sort themselves out.
And you’re done! Slide the sleeve carefully on to your camera strap, and grapple with the weighty dilemma that you can no longer take photos of it because It’s. On. Your. Camera. Sigh.
Get more from The Twisted Yarn from her website, thetwistedyarn.com - or download the camera strap pattern as a PDF from our extensive archive of free patterns here!


_333_180_c1.png)
 Baby
Baby
 Toys
Toys
 Garments
 Crochet
 Homewares
 Dolls
Dolls
Share