

Your knitting FAQs answered!
You’re never too old to learn and we’re constantly finding brilliant hints and tricks to make our crafting lives easier and discovering new ways to refine our knitting technique. Certain aspects of knitting are trickier than others, while some we just can’t get to grips with no matter how many times we’ve tried. Here, we’ve pooled together some of your frequently asked questions and pitched them to top designers and industry experts to create the ultimate guide to improving your knitting skill set. Read on to be inspired!
WHAT YARN SHOULD I USE FOR MY PROJECT?
We believe that there’s a place for every fibre in every stash, but some yarns do work better than others for certain projects. For example, baby knits are better in machine washable yarns. There are many acrylic, nylon and polyamide blends that have been specially made for a baby’s sensitive skin. If you’re looking a knitted fabric with wonderful drape and flow, a finer yarn such as a 4ply or laceweight yarn is going to work best - especially if it’s in a weightier fibre such as cotton or bamboo. These yarns also give lovely stitch definition so are ideal for textured designs.
If you’re not a patient knitter, we wouldn’t suggest choosing anything thinner than a DK for an adult garment. You may even wish to stick with arans and chunkies, especially for warm winter woollies. Larger homeware projects like blankets, throws and pouffes, are a great opportunity to use chunky and superchunky yarns
HOW CAN I IMPROVE THE FINISHING OF MY GARMENT?
“There are a few things you can do to improve the quality of your finished knitted item,” explains Joanne Whitehead, pattern administrator at King Cole. “The first is something you can do when you begin your project. The cast-on row can sometimes look a little sloppy, so on the first row of rib, work every knit stitch through the back loop. This twists the knit stitches and makes the cast-on row tighter. Block each section of your project before sewing it together. This evens out the knitting, and is particularly good for stocking stitch fabrics. It also makes each section the correct shape, so they are easier to sew up. My favourite stitch for sewing up is mattress stitch. It is done with the right sides of the work uppermost and can be used to join side and shoulder seams, making them almost invisible.”
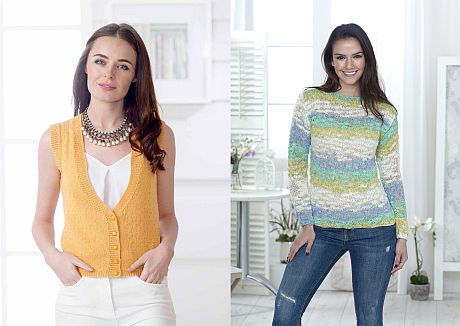
L-R: King Cole leaflet 4499 and leaflet 5065. For stockists, visit kingcole.com
INTARSIA COLOURWORK
Top designer Jem Weston shares her colourwork expertise!
How do you knit intarsia without holes?
“When changing to a new colour, it needs to be linked with the previous colour at the back. You can do this by taking the ‘old’ yarn (the colour you were working with) over the ‘new’ yarn (the one you’re using for the next stitch). When you work the next stitch in the new yarn this forms a link so that they don’t pull apart.”
What’s the best way of weaving in ends?
“It’s important to make sure the ends are secure. I always take loose ends through the stitches at the back rather than under. Splitting the stitches and taking the yarn ‘through’ means that it doesn’t show at the front and also creates some friction to hold the end in place.”
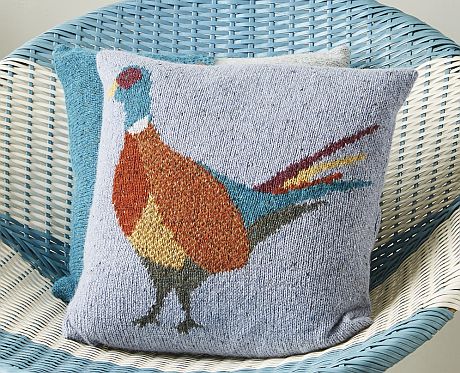
Have a go at intarsia and stranded colourwork in this fabulous pheasant cushion, featured in Jem’s stunning book Cute Comfort Knits. See more of her gorgeous patterns at make.jemweston.co.uk
WE ASKED YOU!
Our readers are full of great ideas. Here are just a few of the tips that have helped them become better knitters:
“Knit a tension square! I never used to bother, but then I saw a craft programme which showed just how differently a garment can turn out if it’s knitted to a different tension. I now do tension squares every time I knit a jumper or cardigan.”
Theresa Chalmers
“Join a knitting group as everyone helps each other”
Susan Westcott
“Watch videos. I’m a visual learner and sometimes photos aren’t enough for me to understand exactly what a pattern calls for.”
@yarnhookedneedles, via Twitter
HOW TO RESCUE DROPPED STITCHES
“Every knitter occasionally drops a stitch, but don’t let it ruin your WIP, simply learn how to pick it up with a crochet hook,” says Sara Mulvey from yarn shop
Black Sheep Wools. “Firstly, secure the dropped stitch so it can’t unravel any further, then take a crochet
hook one size smaller than your needles. For stocking stitch, have the smooth side facing you and place the hook through the dropped stitch. Pick up the last strand of the ladder created and pull the strand towards you to form a new stitch. Continue until you have worked up the ladder. If working garter stitch, you’ll need to alternate the direction you pull the stitch through to keep continuity of the pattern.”
If you’re stuck on a project, pop along to an S.O.S (Save Our Stitches) session at Black Sheep Wools The Craft Barn in Warrington. Find out more at blacksheepwools.com
GET TO GRIPS WITH DOUBLE-POINTED NEEDLES!
LK designer Lynne Rowe offers these handy hints…
1 It’s really fiddly to cast your stitches straight onto double-pointed needles (dpns). Instead, cast your stitches onto one straight needle. Work the first row of your
pattern, but don’t turn at the end. Slip these stitches over your dpns without turning or twisting your work then bring the end dpns together to knit in the round.
2 To “join in the round”, slip the first stitch from the left-hand dpn purlwise onto the right-hand dpn, then lift the second stitch on the right-hand dpn over the first stitch and leave it on the left-hand dpn. This creates an invisible join that requires no stitching together!
3 When knitting the first stitch on the next dpn, always pull the yarn a little tighter before knitting so you don’t get loose stitches at the same point in your work. Also, you can avoid creating a ‘ladder’ by knitting one extra stitch on each dpn on every round.
Visit lynnerowe.weebly.com/ to see what Lynne has been knitting lately.
HOW TO PERFECTLY PICK UP STITCHES
This technique is often used on the neckline and opening edges of garments. We asked LK designer Jo Allport for her advice.
“Working out how many stitches to pick up can appear to be a black art, but it’s all down to maths, sprinkled with a healthy dose of common sense!” she says. “On a straight edge, the length of the edge should be multiplied by the tension and the resulting stitch count rounded. The key is to know the tension for the stitch pattern you will be working the picked up stitches in. The curve around a neckline can be more problematic. I tend to pick up a stitch for every row as you can always work a decrease or an increase on the next row to get the correct stitch count.”
Jo also recommends using a circular needle, even if you’re not working in the round. “It means I can see by stretching the knitting slightly whether I have picked up the right amount,” says Jo. “When picking up on a selvedge, insert the needle one whole stitch in from the edge. This helps remove holes and keeps the stitches looking neat. If I have more than ten stitches to pick up, I pin the edge into sections so I can pick up the right number of stitches between the pins.”
SPOTLIGHT ON SOCK KNITTING!
How do you get the right fit?
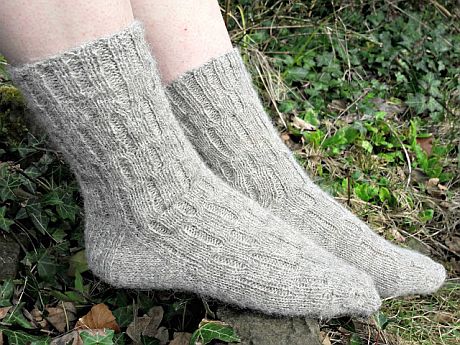
Blogger, author and designer Christine Perry, a.k.a Winwick Mum, shares her top tips:
1 Hand knitted sock size is based on foot width, not shoe size, and the best measurement for calculating this is around the ball of the foot – the widest part of your foot just beneath your toes.
2 You’ll need to know the tension you knit at – yes, this does mean a tension swatch, and you’ll need to swatch in the round too! It doesn’t have to be big, just enough to count the number of stitches per inch (2.5cm). Knitting in the round does affect tension so change your needles if required – you’re looking for 7-8 stitches per inch.
3 Use your foot measurement and your stitches per inch count in the ‘Sock Stitch Calculation’ on my website (use the search box on the left-hand side) to find the right number to cast on.
4 If you have a high instep, make your heel flap longer so that your gusset is longer too.
5 Always try your sock on before starting the toe decreases and make sure you’re standing up so that your foot spreads out to its natural walking position.
To read more from Christine or join one of her brilliant sockalong tutorials, visit winwickmum.co.uk
Can you knit socks on circular needles?
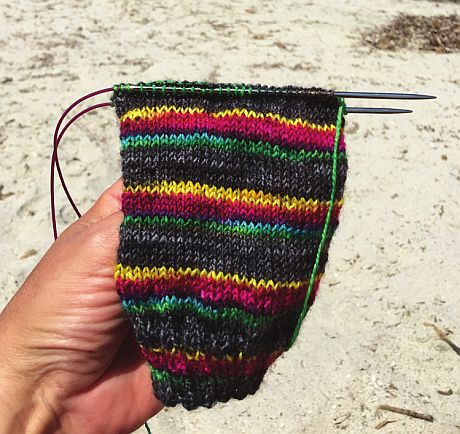
© Helen Kurtz
We caught up with sock knitter and Stylecraft blogstar Helen Kurtz to find out more:
“Using a circular needle and the Magic Loop technique to knit socks has been a revelation – gone are the days of feeling like you’re wrestling with a hedgehog as you tackle those first few rounds with dpns! I find an 80cm circular needle is perfect for socks. You have the stitches for the top of the foot on one needle tip, those for the sole on the other and move between them by sliding the stitches up and down the cable. Magic Loop is very quick to learn (look for videos online) and there are no
ladders up the socks. When you’ve finished knitting, just slide the stitches back down onto the cable so there’s no chance of them falling off the end. Do give it a try – I think you’ll be very glad you did!”
Read all about Helen’s latest makes at theknittingexploitsofjosiekitten.blogspot.com
Our local yarn shops are packed with knowledgeable knitters. If you’ve got a question about your current project or need help with a specific technique, pop into your nearest store and ask the experts!
Finally, don’t forget to browse the Let’s Knit Together blog for more expert guides, photo tutorials and expertise on yarn to help you improve your knitting skillset.


 Baby
Baby
 Toys
Toys
 Garments
 Crochet
 Homewares
 Dolls
Dolls
Share