Rachel Kluesner is an indie dyer and crafter based in St. Louis, Missouri, and owner of Dyeabolical®. Rachel specializes in hand dyed sock yarns, hand dyed spinning fibres, and handmade soap. Rachel gives us an insight into the world of dyeing your own fibre.
Dyeabolical® Yarns & Spinning Fibers began in 2007 when I had trouble finding my favorite colours at local shops. I craved bright colour and lots of it. At the time, hand dyed spinning fibers were all but impossible to find, so I dyed my own!
I have three goals when dyeing spinning fibres: 1) work with colours I enjoy; 2) that colours are set well and won’t migrate during washing; and 3) that fibres are not compacted or felted during the dyeing process. The method below is one way to achieve all three goals.
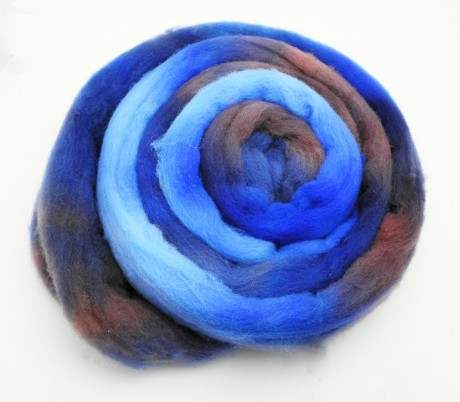
Pre-wetted fibres help keep the colours more distinct. Starting with dry fibre encourages a lot of colour blending and can lead to unpredictable colours and a little more mess, but to me that is half the fun. The choice is yours. Try to pick colours that blend well together, such as purple/pink or yellow/blue. I used two blues and a salmon pink. I know from experience that the lighter blue and salmon pink blend to a purple-ish brown color that goes really well with royal blue.
This method can be a bit messy, but worth it, so have plenty of towels on hand! Here’s what you’ll need:

- Steamer pot or crock pot; stir sticks or spoons (but remember not to not reuse these for food!)
- Plastic wrap
- Freezer bag (optional)
- Cups, jars, or other containers for holding the dissolved dye
- Vinegar
- Acid dyes in two or three colours
- ¼ teaspoon and 1 tablespoon measuring spoon
- 4oz combed wool top
- Newspaper to protect your dyeing surface
- Gloves
- Dust mask
- Hot water
- A bowl for holding wet towels and used utensils
- Towels or rags for sopping up excess dye
1. Safety first! Cover your work surface with a tarp or old newspaper. Put your gloves and dust mask on. Keep the dust mask on until the dye is mixed and the dye spoons have been rinsed off.
2. Add ¼ teaspoon of dye to each jar. Add 1 tablespoon of white vinegar (to help set the dye) and 8 -16 oz of very hot tap water. Stir well and let cool. Use less water for darker colours and more water for lighter colours.
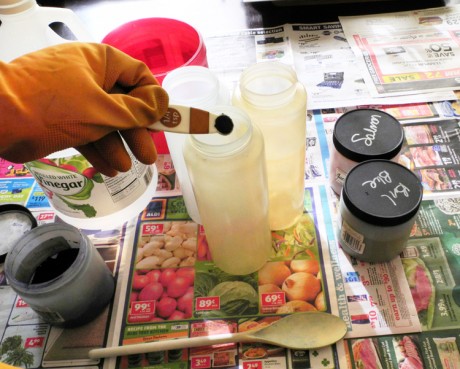
3. Lay out several overlapping pieces of plastic wrap and pinch the long edges together to form a seal. You want enough plastic wrap to wrap up your fibres once you are done dyeing.
4. Lay your fibre on to the plastic wrap and begin dyeing! Pour dyes directly on to the fibre and use your hands to gently work the dye in to the fibre. Use as much or as little dye as you want. Beware, your fibre will only be able to hold so much moisture. Keep towels handy to sop up any escaped dye liquid.
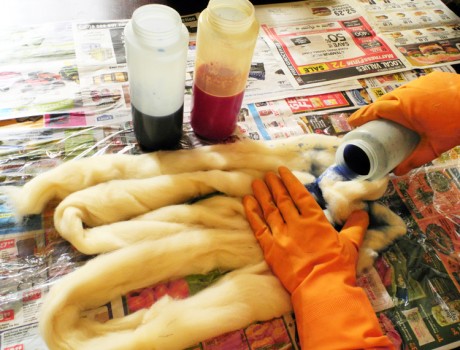
5. Wrap your fibres up in the plastic wrap. You may want to wrap the package in several layers of plastic wrap to prevent leaks or use a zipped plastic bag.
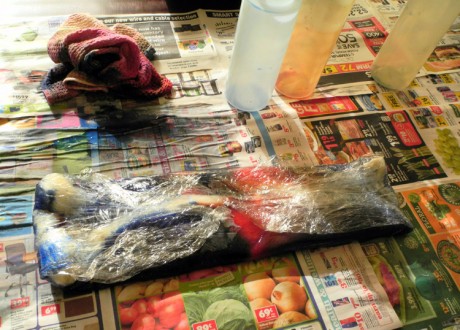
6. Cook your fibre package until the excess dye in the package turns clear (or nearly clear). This takes about 30-40 minutes in a steamer, or slightly longer in a crockpot. Turn off the heat and let cool to room temperature.
7. Prepare a bowl of warm water with a few drops of washing up liquid. Remove your fibre from the plastic and soak for 20 minutes. Do not agitate. The water should be clear, or nearly clear.
8. Gently drain the excess water from your fibre. Hang to dry. Your fibre may look a little bedraggled when wet. This is normal. It will fluff back up when dry.
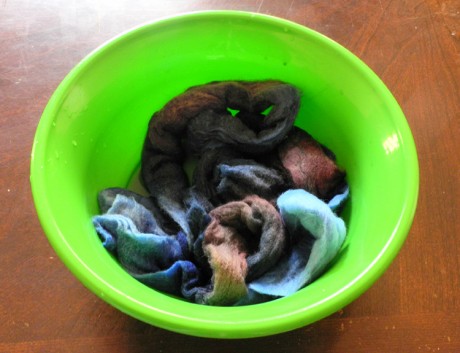
9. Give your dry fibre a few gentle snaps to finish it off. If you controlled your temperature and avoided handling the fibres while hot and wet then you should have a very colourful and spinnable fibre for your next project.
Find out more about Dyeabolical on their website.




_333_180_c1.png)

_Craftihive_Let_s_Knit_Website_Blog_-_7.9.25_HEADER_IMAGE-01__333_180_64_c1.jpg)

 Baby
Baby
 Toys
Toys
 Garments
 Crochet
 Homewares
 Dolls
Dolls


Share