


Learn the knitting basics in just 30 minutes!
Getting Started
In this handy guide, we will take you through your bread-and-butter stitches and get you on your way to becoming a knitter extraordinaire.
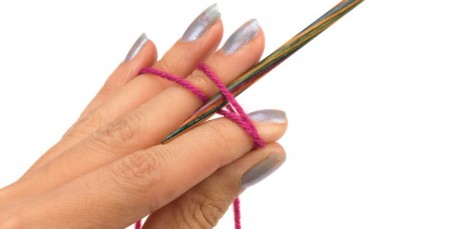
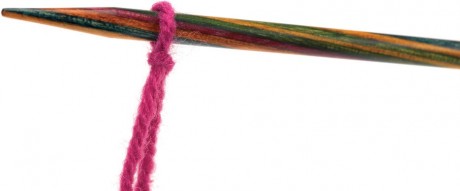
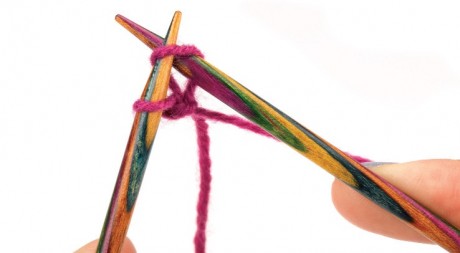
Making a slip knot
First, make a slipknot. If you don’t remember that one from your scout badge, here’s how to do it:
Step 1: wrap the yarn around your fingers twice overlapping the strands as shown. Insert needle under the front loop and hook the back loop with the needle.
Step 2: Pull this strand under the front loop and off the fingers then pull to tighten
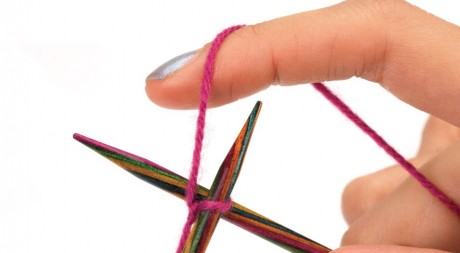
Casting on
There are many different cast-on methods and each serves a different purpose. We’ll show you the two-needle method, because once you’ve learnt that, you’re really close to mastering the knit stitch too! Your slipknot counts as your first stitch.
Step 1: hold the slipknot on one needle (this is your left hand needle) and insert your other needle (right hand needle) through the front of the stitch, and wrap your yarn around the tip of the RH needle.
Step 2: hook the wrapped yarn and pull it through the slip knot, now place this loop on to the end of the LH needle. This is your first cast on stitch! Keep doing this until you have cast on the right number of stitches.
The knit stitch
This is the most common stitch in knitting. Knitting every row is called garter stitch. Here’s how it’s done:
Step 1: insert your right hand needle through the centre of the stitch on the left hand needle from left to right and wrap the yarn from the ball around the tip of the right hand needle
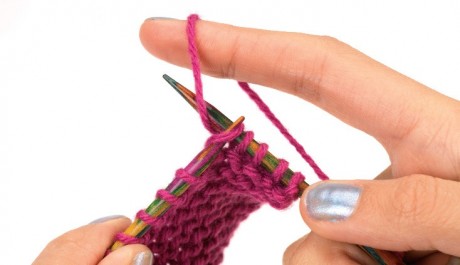
Step 2: with the right hand needle, hook the wrapped yarn and pull it through the stitch on the left hand needle. Slide the original stitch off the left hand needle and leave the new loop on the right hand needle. This is your first knit stitch.
Just keep doing this in every stitch to the end of your row. At the end of the row, swap the needles in your hands and work back in the other direction.
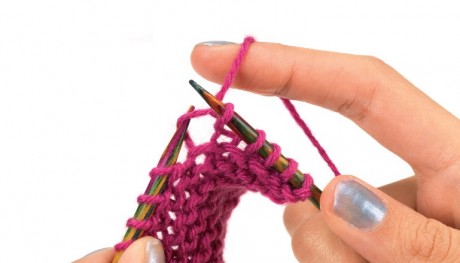
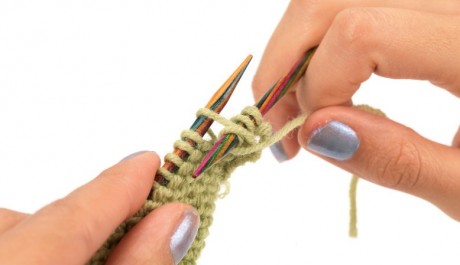
Casting off
When you want to finish knitting you need to cast off.
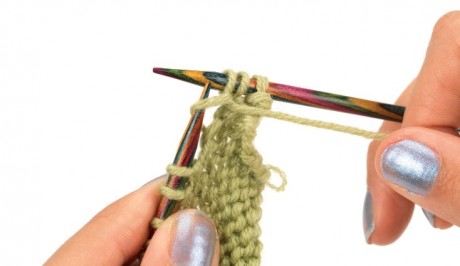
Step 1: knit two stitches as shown before, then insert the left hand needle into the first stitch you knitted

Step 2: with the left hand needle, lift this stitch over the second stitch worked, and off the end of the right hand needle. One stitch has been cast off. Repeat this along the row.

When you reach the end of the row, just cut the yarn leaving a tail, and thread this tail through the last stitch on the needle.
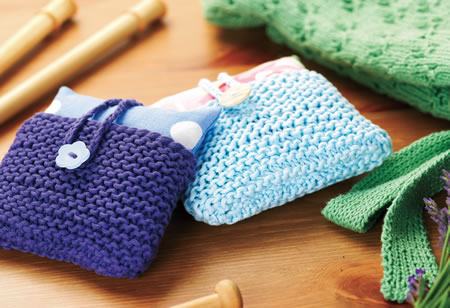
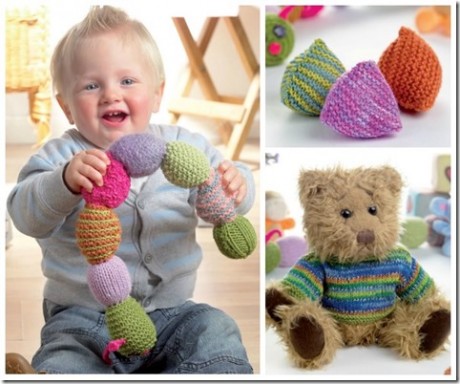
Now you can make our easy knitted lavender sachets? Get the pattern here.
Stocking stitch or stockinette stitch is the most common fabric, and it’s made up of one row knit, one row purl. Here’s how you do the purl stitch:
The purl stitch
Step 1: insert the right hand needle into the next st on the left hand needle from right to left as shown, then wrap the yarn from the ball around the tip of the right hand needle
Step 2: use the right hand needle to hook the wrapped yarn and take it back through the stitch on the left hand needle. Slide the stitch off the left hand needle and leave the new stitch on the right hand needle.
Now you’ve learnt all the basic stitches! Give them a go in a few of our fab free patterns!
This toy trio is fun and easy to knit! Find the free pattern here!
Show us your finished makes on our Facebook and Twitter pages!
_333_180_c1.png)


 Baby
Baby
 Toys
Toys
 Garments
 Crochet
 Homewares
 Dolls
Dolls

Share