


Join knitting designer Jenise Reid for part two of her guest blogging series, as she explains the most flattering place to position cuffs and hemlines.
One of the great things about knitting is the ability to adapt garment patterns to suit your shape - a little extra wait shaping here, a couple of bust darts there. But one of the easiest adaptations to make is the length of your sleeves and other hems. But what is the most flattering way to to so?
When you think about where a loose sleeve or hem should end, observe where your arm/leg/hip curves inward at the steepest angle, and end the loose section of the garment right before it. Your eye will follow the line of your body and assume if it is pointing inward, that the body underneath the garment is moving inward. The opposite is true as well. If your garment obscures the exact shape of the body, and the part of the body closest is curving outward at a wide angle, your eye assumes the body just gets larger underneath.
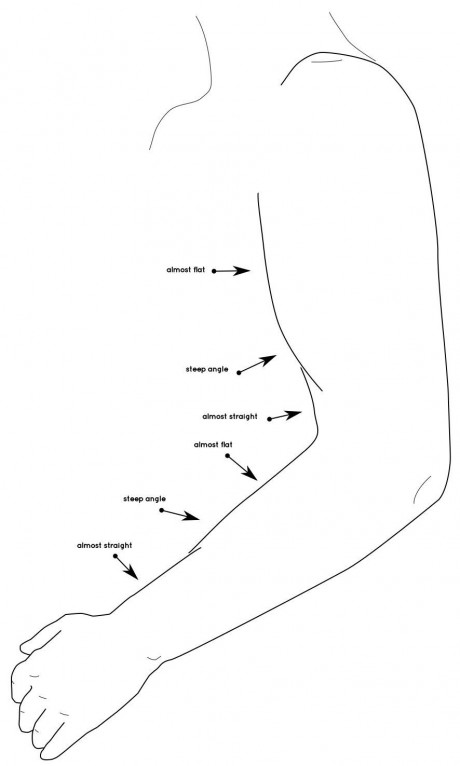
We will use an arm as the example. The exact curves will depend on the person – some ladies arms are almost the same size around from the wrist all the way up, and the upper arm can be smaller at the top than right above the elbow. I chose a fairly typical arm shape with a little extra weight and muscle.
You might notice that the arm expands at a steep angle right in the middle between the wrist and elbow, and then between the elbow and shoulder. (Again, this is usually true, but not always. Have a look at your own arm and see where yours is mostly straight, and where it expands.) The curves are steepest on the inner side of the arm, but pay attention to the outer edge as well.
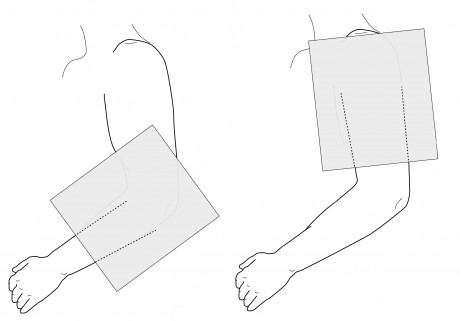
Now, what if we obscure the shape of the arm (either by the end of a loose sleeve, or perhaps this is where a tight ribbed cuff ends and the sleeve blouses) right over the steepest angle of the arm, hiding the fact that it is pretty much straight after this? Well, your eye sees the steep angle, and assumes this angle is continuing all the way up:

But, if we cover up the area where the arm expands, your eye will instead assume the arm continues on straight underneath the sleeve:
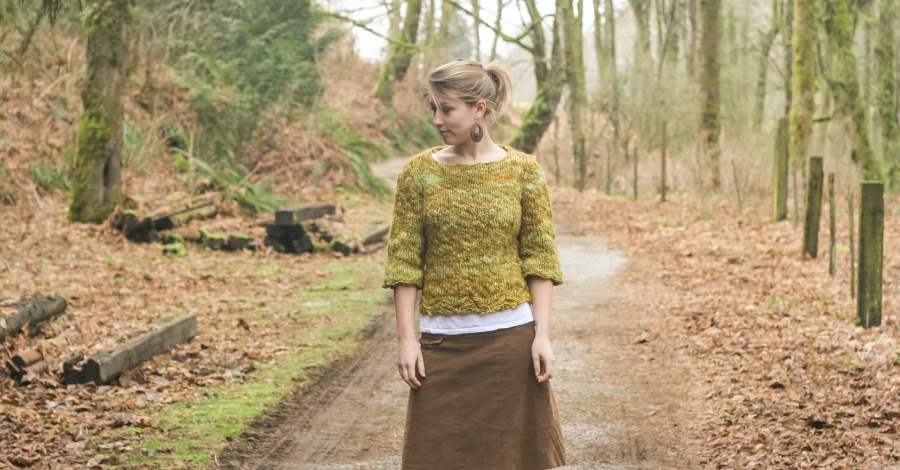
You can also see this effect in my handspun pullover design at the top of this post!
Now, I would encourage you to go find a piece of paper, stand in front of a mirror, and see for yourself! Hold the paper over your arm in different places, and discover the most flattering location for your sleeve to end.
As you plan your next handknit sweater, keep in mind that we are only talking about where the shape of the body is obscured. Fitted sleeves will not create this illusion. Ribbing will show the shape of the arm. What this tells you is where your sleeves tight ribbing should end, or where a loose sleeve should end.
This same principle applies to the rest of your body as well. Find a nice big paper, and use it to decide where the bottom of your sweater should end on your hips, or where the bottom of your skirt should end…
Read part one of Jenise’s series on knitting to flatter here. To see more of her designs and try them out for yourself, check out her Ravelry page.
_333_180_c1.png)


 Baby
Baby
 Toys
Toys
 Garments
 Crochet
 Homewares
 Dolls
Dolls

Share