


Loving our Summer of Socks? So are we! A rite of passage for any knitter, socks are the perfect warm weather project as they are small, portable and quick to knit. Whether you’re still a sock newbie or just want a couple of tips on how to make your footwear extra fancy, we’re on hand to help!
Sock Anatomy
Cabled, lacy or just plain vanilla, all socks have basic construction elements. If ever you get confused on whereabouts on the sock you are, just take a look at our diagram to set you back on track!
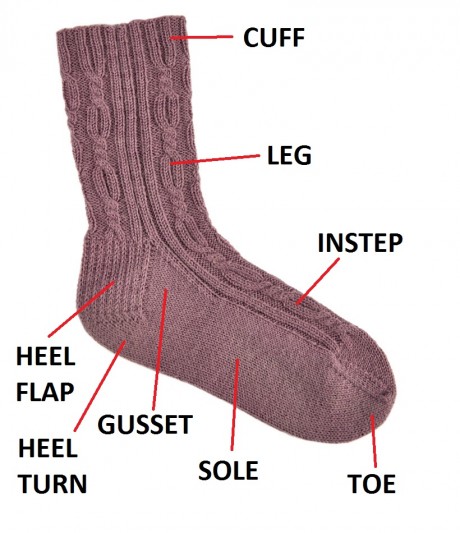
1. Cuff

This part stops your socks sliding down, so use a stretchy stitch, such as rib to ensure they fit comfortably. If working your socks from the top down, you will need to use a cast-on method that allows your socks to stretch. Similarly, if working from the toe upwards, your cast-off row will need to be nice and stretchy.
2. Leg
This is the part where you can really get creative! If you are making standard length ankle socks, there will rarely be any shaping in this section, so it is the perfect place to introduce a lace, colourwork or cable pattern. If you are making longer socks, you will need to incorporate some shaping in the back of the leg to fit your calf.
3. Heel
—Method 1: Heel Flap—
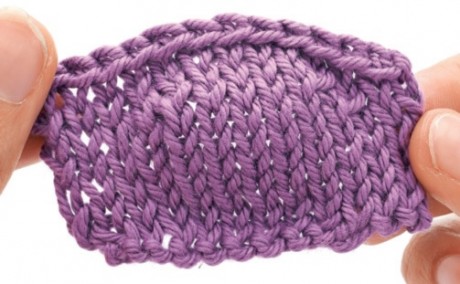
One of the most common methods of working the heel is to use a heel flap. This is a strip that forms the back of the heel. While the cuff and leg are worked in the round, this is worked back and forth on rows. Typically, half your stitches will be used for the heel flap. It often helps to transfer all heel stitches on to the same needle while you work. You can choose to do different stitch patterns on the heel flap, but always begin every row with a slip stitch.
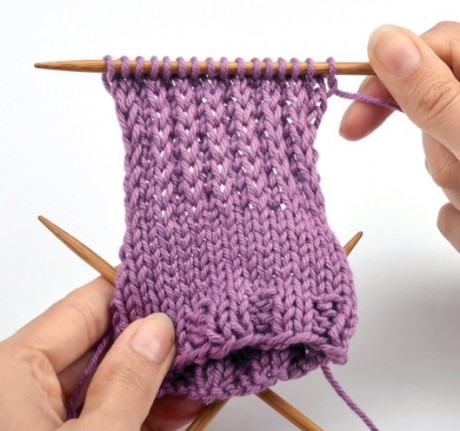
This example is worked over an even number of stitches as follows:
[ ] Row 1: (sl 1, k1) to end
[ ] Row 2: sl 1, p to end
[ ] Repeat Rows 1-2 until the heel flap is the correct length to fit down the back of your heel
By slipping stitches across Row 1, you will create a thicker fabric that will make the heels of your sock more hardwearing.
—Turning the Heel—
When your heel flap is the desired length you will need to start shaping; this is known as turning the heel and involves decreasing. Here is a typical example:
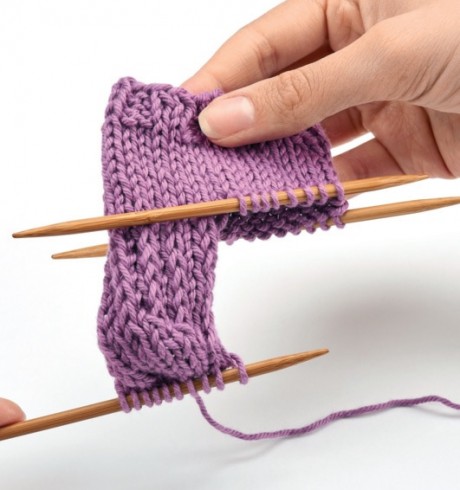
[ ] Row 1: sl 1, k half of your heel stitches, ssk, k1, turn
[ ] Row 2: sl 1, p3 (this number may vary in your pattern), p2tog, p1, turn
Notice how you have a gap where you turned on the previous row.
[ ] Row 3: sl 1, k to one stitch before the gap, ssk, k1, turn
[ ] Row 4: sl 1, p to one stitch before the gap, p2tog, k1, turn
[ ] Repeat Rows 3-4 until all heel stitches have been worked.
—Shaping the gusset—
You now need to join back in the round.
Step 1: knit across your heel stitches, then using a spare needle, pick up and k one stitch in each slipped stitch down side of heel flap.
Step 2: using a spare needle, knit across the first needle holding your instep stitches, use another spare needle to knit across the remaining instep stitches. Using another spare needle, pick up and k one stitch in each slipped stitch down side of heel flap.
Step 3: using the same needle, k half of the stitches from the heel. This is now the start of your round. Slide the other half of the stitches on to the front of the next needle.
[ ] Rnd 1: k to three sts before instep, k2tog, k1, k across instep stitches, k1, ssk, k to end
[ ] Rnd 2: k
[ ] Rep last two rnds until you are back to the same number of stitches as were cast on.
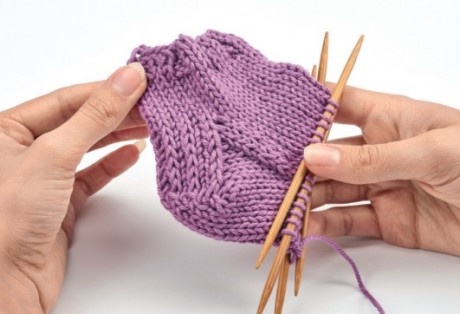
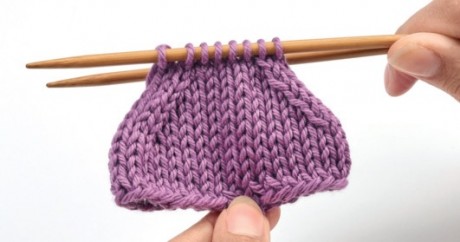
—Method 2: Short-row shaping—
Another method of working a heel is to use short row shaping. This gives a diagonal seam, similar to those seen on the socks you can buy from a shop. It can also be used when working socks from the toe up. It involves working over a section of the row multiple times to create a curve in the fabric.
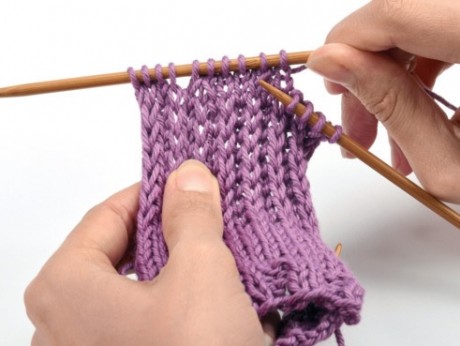
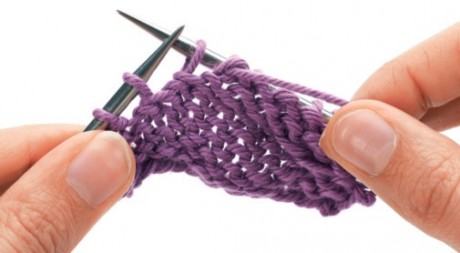
How to work a wrap and turn (w&t)
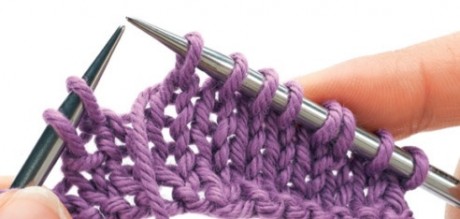
Step 1: bring the yarn to the opposite side of the work between the needles.
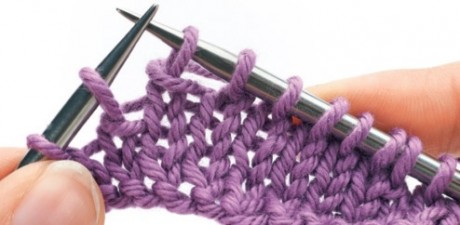
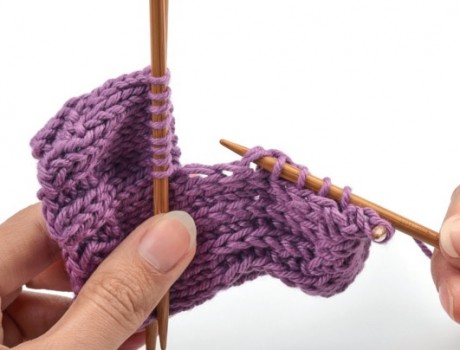
Step 2: insert the RH needle into the next stitch as if to purl and transfer it to the RH needle, then move the yarn to its original position.
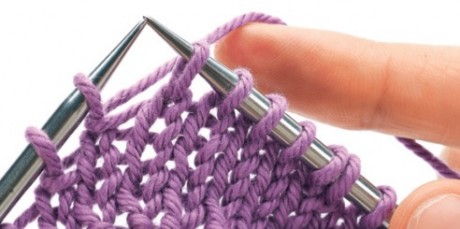
Step 3: return the slipped stitch to the LH needle.

Step 4: turn the work and continue in the other direction.

You have now wrapped a stitch. Continue until all heel stitches have been wrapped.
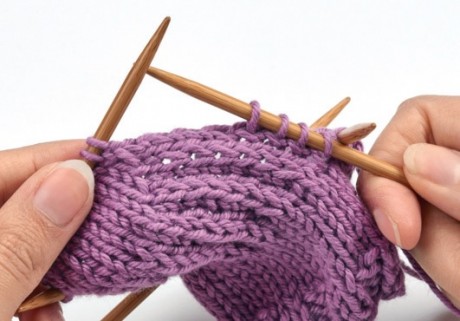
—Working wraps together with stitches on a purl row—
By working the wraps together with the stitches, it makes them invisible and creates smoother shaping.
Step 1: slip the wrapped stitch from the LH to RH needle.

Step 2: insert the LH needle into the wrap.
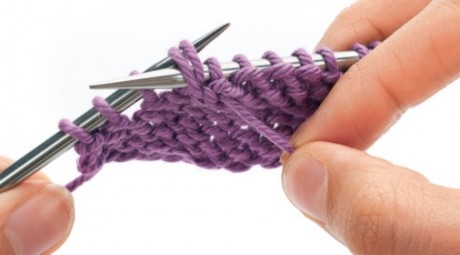
Step 3: return the stitch to the LH needle and purl two together.
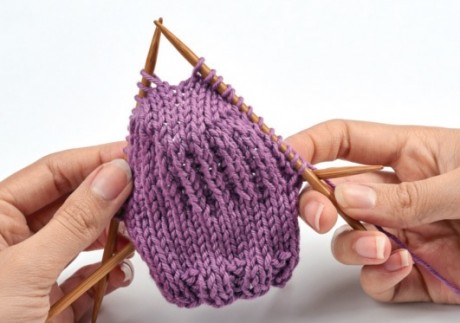
When you have finished, one section will have more rows than the others. This creates the shape of your heel.
—Working wraps together with stitches on a knit row—

Insert the RH needle up through the wrap and into the stitch, then knit the wrap together with the stitch.
4. Foot
Knit every round until the foot measures around 5cm less that desired total length. This is approximately the length to the base of the big toe. You can decide whether to work the instep stitches in a fancy pattern or use stocking stitch, but stocking stitch is usually used for the sole stitches as it is more comfortable to walk on.
5. Toe
Now it is time to decrease to taper the end of your sock. However, if you decrease too many stitches, you’ll make your socks too pointy. If you don’t work enough decreases, the end will be square and uncomfortable when you wear shoes. Your pattern will tell you when to stop and after you have made a few pairs of socks, you’ll have worked out the shape that best suits your feet.
[ ] Rnd 1: Sole: k to three sts before instep, k2tog, k1, Instep: k1, ssk, k to last three sts of instep, k2tog, k1, Sole: k1, ssk, k to end
[ ] Rnd 2: k to end
[ ] Rep Rnds 1-2 until half the number of sts rem
[ ] Next rnd: using the last needle, k to end of first set of sole sts and
distribute sts so the sts are evenly spread on two dpns and held parallel.
You can now to finish your socks by grafting the ends together using Kitchener Stitch or working a three-needle cast-off. Cut the yarn and thread the tail on to a tapestry needle, run it through all the remaining stitches, pull tight to gather and fasten off.
Have you ever made a pair of socks before? Tell us all about it over on our Facebook and Twitter!
_333_180_c1.png)


 Baby
Baby
 Toys
Toys
 Garments
 Crochet
 Homewares
 Dolls
Dolls

Share